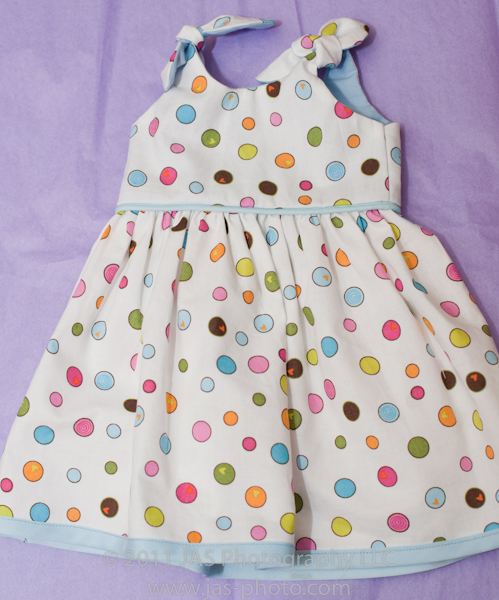
The truly Itty Bitty Baby Dress

As part of my week of sewing (which unfortunately has not gone completely as planned), I made another Itty Bitty Baby Dress by Rae – but this one is truly itty bitty – made for a newborn.
We have a friend who just had a baby, so it went out in the mail yesterday – I’m so excited!
I sent it along with these super cute address labels with their names on them (available at my Etsy shop – 50% off for a limited time – use coupon code “50off”):

Tonight’s projects:
1) Scan all of R’s recent art
2) Make a sun hat for R – using this pattern by Prudent Baby I found on Grosgrain which is having free pattern a month day!
Wish me luck! =)
Daily Post Weekly Photo Challenge: Wildlife
Here is my contribution for the daily post’s weekly photo challenge this week. It is from Manuel Antonio in Cost Rica a couple of years ago. I had some fun pictures from a safari in Tanzania, Africa – but they are all in print and after my move, I haven’t been able to organize all of my negatives in an easily accessibly way…so that will be for another day =)

These other two are from last month at the zoo!
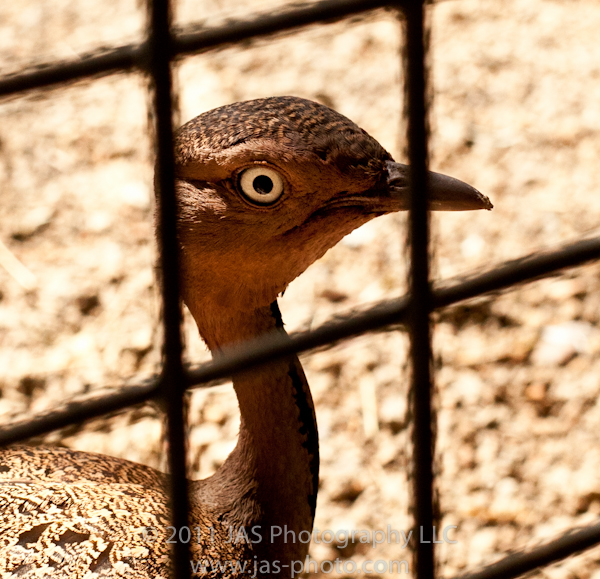

Check out some other great entries here!
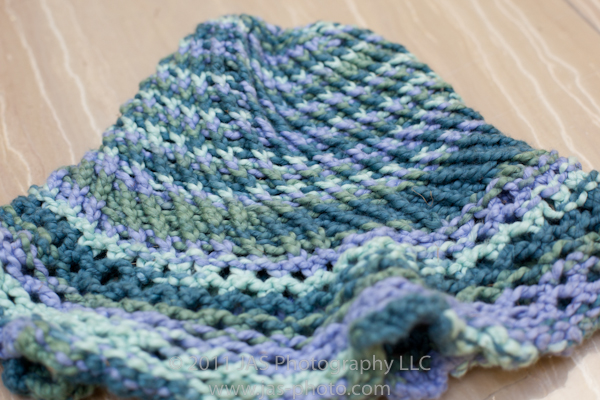
Spring hat and scarf
 |
| R’s new hat & scarf – courtesy of many hours of plane travel over the last several weeks! |
THE HAT
A while back I re-posted a cool spiral (free) lace hat pattern I found online, and decided to finally make it on my way to and from Italy a couple of weeks ago. I bought this really pretty varying color organic cotton blues, greens and of course a little bit of purple (R loves purple!). Well, I didn’t do a ton of knitting on the way to italy or on the trains in italy – and finished most of the hat on the way back. I started off with the spiral pattern I noted above, but it was ending up being very loose and without any form. It was pretty, but I was worried that it would not stay on R’s head. I think may have done something wrong because looking at the original picture of the hat it looks like it has more shape than mine did…
Anyways, because of how it was turning out, I decided to make some adjustments. After doing about a 3 inch rim of the lace pattern, I figured I would do a 1×1 rib so that it would be tighter fitting on the hat, and thought the lace would make a nice rim to protect R’s face form the sun. I took it a bit further and decided I wanted to keep the pretty spiral pattern of the hat in tact, so I modified Jared Flood’s Koolhas hat pattern to be a 1×1 rib that spiraled in one direction.

This is what I did (bare with me – i am giving a general explanation of how to do the spiral rib – not actually writing a ready to use pattern):
After doing 3 inches of the pattern described in the previous post for the spiral hat (click here) – make sure to keep a marker at the end of your round
- do a 1×1 rib as follows
- row 1: knit 1, purl 1 (if you are knitting in the round, you want to make sure you have an even number of stitches)
– this is going to vary a bit based on the spiral and cabling below – but the main concept is to make sure you are always knitting a knitted stitch and purling a purled stitch – that way the ribbed pattern will remain.
- row 2: cable 1 knitted stitch (from the front) to the left – i.e. slip the first knitted stitch onto a cable needle, purl the next purled stitch, then knit the cabled stitch. do this all the way around till the end of the round
- repeat these two rows over and over until you are ready to reduce for the crown (about 4-5 inches). A note: when you get to the end of each round, you will need to adjust a little, because your marker will start moving one stitch every time – i.e. the first time your first stitch will be knitted, the next time it will be purled. So you need to move your marker forward or back by one stitch when this happens, so that the first stitch after the marker is a knitted stitch. it doesn’t really matter what direction you move the marker – i would just alternate so that it more or less stays in the same spot.
- when you are ready to reduce – you basically want to reduce the purled stitches first, so that you continue to see the spiraled ribs. I did this by K2tog with a knitted stitch and purled stitch – i.e. the purled stitch ended up underneath (and hidden!) under the knitted stitch. As you are reducing, you still want to cable the knitted stitches on every other row. it becomes tricky, and I improvised as I went along – which is why I don’t have a hard and fast pattern to give you. if people really like it, please ask and I can try to put together an actual ready-to-use pattern. Once you have reduced all the purled stitches, then start to reduce the knitted ones – again space them out. After seeing how this fits my daughter, I would suggest doing a pretty rapid reduction in the crown because otherwise the top of the hat becomes too skinny to sit on the head and ends up sticking up (i keep having to stretch out the top to make it sit flat on R’s head exactly for that reason).
- Once you are down to about 12-16 stitches, you can then loop the end of your yarn through all of them, cinch it off and then weave in the ends. And you’re done! Yay!
 |
| The top part of the hat has a spiral ribbed pattern (1×1) – where every other row I cabled the knitted stitches over the purled ones to the left |
 |
| the outer rim of the hat is a spiral lace pattern using yarn overs – from the pattern I posted a while back |
The scarf was very simple and I finished it in one plane ride. I am going to tell you what I did to make this one, which is for my 2.5 year old daughter. it is pretty thin and short (about 3 feet) because she likes to just put it around her neck and not wrap it around. So I didn’t want it too long otherwise she would trip! Feel free to make it longer/thicker as you desire. As you will see below, I made this VERY simple – I did not worry about purling any stitches. I was in need of a quick project so that I wouldn’t loose interest before it was done =)
- Row 1: Using 29 inch size 9 needles, cast on 560 stitches. The gauge for my yarn was 20 stitches per 4 inches on size 7. I used a cable cast on which I would NOT recommend. That is why one side is more frilly than the other. The Cable cast on just does not have enough slack to really make a nice ruffle.
- Row 2: K2Tog for all stitches to the end
- Row 3: (K2tog, K1) repeat till end
- Row 4: Ruffle is done! Now for the body of the scarf, just do a garter stitch – i.e. knit every row until it is as thick as you want it
- For the other end of the ruffle:
- Row 1: K1, K1 then knit through back loop of same stitch (this is your increase) – this should give you 3 stitches on your right needle. Repeat this till the end of the row (i.e. you are increasing every other stitch – increasing your stitch count by a third)
- Row 2: K1, then knit through back loop of same stitch – this should give you 2 stitches on R needle. Do this till the end of the row (i.e. you are increasing on every stitch – doubling your number of stitches)
- Row 3: Cast off!
- And you are done! YAY!
Hope you guys enjoy!

Unfortunately I haven’t been able to get great pictures of R in the scarf and hat yet…but here are a couple. She actually likes them and wears them! Finally!
 |
 |
A week of sewing day 1

So, I’m a little late with this post – but I am supposed to commit to sewing for an hour every day this week as part of the kids clothes week challenge. Yesterday I met that goal – from 1am-2am and made these pajamas =)
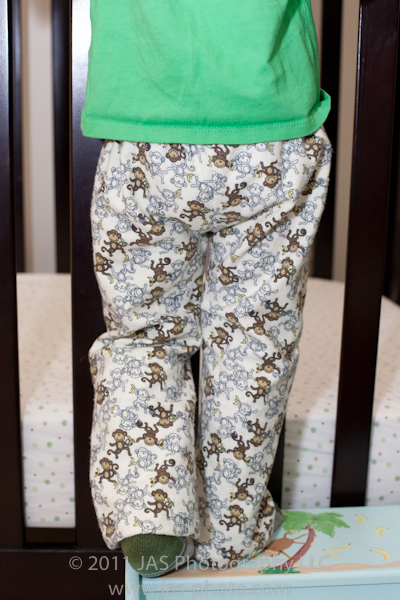
These are the first pair of pants I have ever made… I used instructions from Dana-Made-It on how to make your own pattern using existing pajamas, but forgot to leave enough space at the top for an elastic casing. So I did something I hadn’t done before – sewed the elastic directly onto the pants – you know, using a ball point needle and stretching the elastic as I went. I always enjoy learning and trying new techniques – so it was fun! They are by NO means perfect fitting, but they work and withstood a full day of playing!

Today I was planning on working in a sky tent that I started for R a while back…but just haven’t had time to get to it yet as I have a project due for work. So the plan is: work on my project for an hour, get A LOT done, and then work on my sky tent from 11-12 to meet my commitment. Wish me luck!

I Heart Faces Photo Challenge: Motherhood
Here is my contribution for this week’s photo challenge on I Heart Faces!
Check out some more great entries!


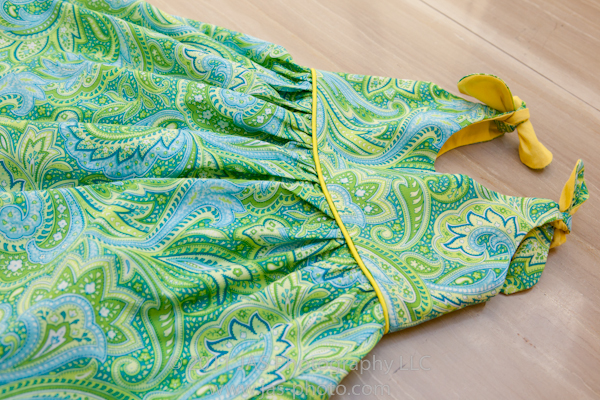
The Itty Bitty Baby Dress by Rae

Today I made Rae’s (from Made by Rae) Itty Bitty Baby Dress for R – it was really straight forward and so much fun! She links to an enlargement patter
n for a 3T size since hers is for newborns, and I used that. Given that R is only 2 1/2 and she is SUPER skinny, I spent some time re-working the pattern in a way that I thought would fit her better, given that she has her dad’s physical makeup (thank goodness!): tall and lean. So after about an hour of cutting the pattern, reworking the pattern, and then cutting the fabric, I sewed for about 2.25 hours, and I was done! It was so great! It would have of course taken longer if I was doing it while R was with me…but she was in school today. It was pretty funny because she helped me pick the fabric from my stash last night, so I knew she would like it.
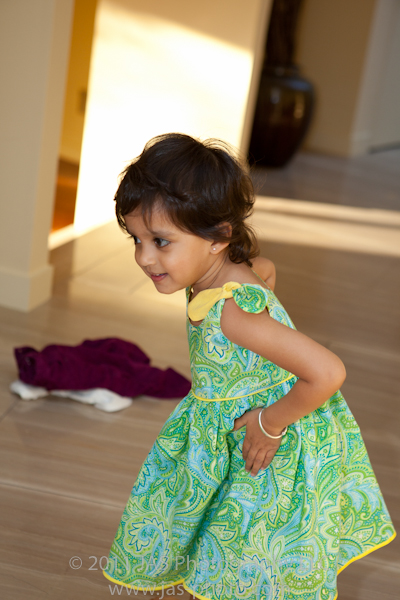
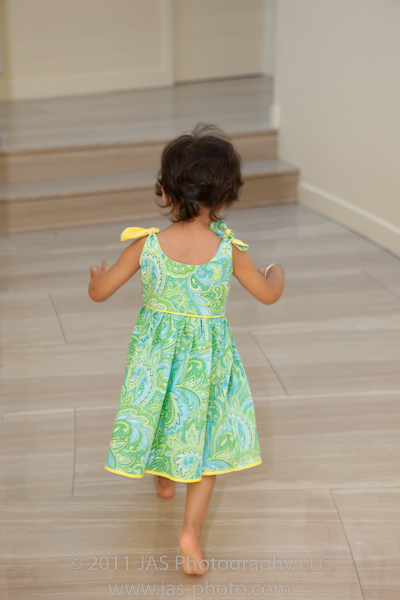
After a lot of protests, I finally got her to put on the dress (correction: I got her undressed for her bath and then slipped the dress over her head before she was the wiser =) and she seemed to have a lot of fun running around in it! In fact, after we finally did give her a bath, she started crying because she wanted to put on the dress instead of her PJs!

So any recommendations after using the pattern? Only that if you have a skinny child like mine, there is a LOT of room in the enlargement to remove in order to make it fit better. So just take some centimeters off the sides, a little bit off the bottom and you can shorten the sleeves a bit – and you’re good to go!
I am super excited to try out other dresses and non-clothing items for her!!

Getting excited to sew everday for a week!
I have been getting very excited about my new serger and all the new projects I am going to try as soon as I am back to my regular non-work schedule (my husband is sick of me saying “i’m going to make that on my serger!”). I am also getting very excited about spring and all the cute dresses R will be able to wear! So in prep, i have been looking online for different toddler girl dress patterns and came across this challenge: the Kids Clothes Week Challenge. I love it! I need a goal and some motivation to force myself to actually get some sewing done! I used to find energy all the time to just sew in the evenings, but lately I’m so tired I can barely do much of anything. So this will be my motivation =) Thanks Elsie Marley!

Weekly Photo Challenge: Round

Here is my contribution for the Daily Post’s Weekly Photo Challenge!
Check out more great entries here. =)
Some fun with depth of field…

Weekly photo challenge – ONE
Here is my entry for the Daily post’s weekly photo challenge posted yesterday: ONE
 |
Addendum: in reviewing all my pictures, I realized that I think my husband L took this picture. Then I did the post processing. When we go on vacation, we both spend a lot of time taking pictures since we both en joy it. Often times, we will point something out to other one and the other one will take it and go with it. So when I look at pictures years later, I often forget who took what. But I was thinking about this one, and am pretty sure he took it – so wanted to give him credit! Now I just need to teach him how to use lightroom so he can have fun doing the post processing too!
