iPad art

R had some fun drawing on my ipad the other day. the cool part is that i can just email myself the pic – no worries about scanning first. not to mention that her hands don’t get all dirty with paint…that being said, i kind of like it when she gets paint all over her! it is healthy for the soul!

The Daily Glimpse Project #2
as I mentioned over on my other blog, simple beauties, I am going to try to take a picture a day and post it. whether it is my daughter or nature…on my iphone or my 5D…doesn’t matter.
i decided to post them up here (although man, I wish I could combine my blogs instead of having 2 separate ones!)
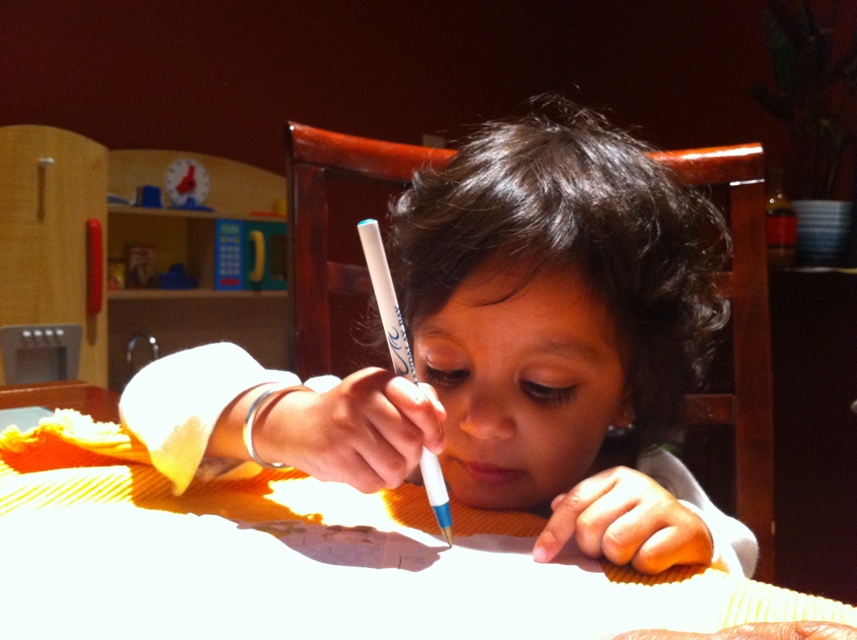
so today’s pic: my little girl writing for the first time! i mean writing for real…writing the number “10” over and over! thanks to her grandmother who doesn’t think “oh, she’s too young to learn that” (like I often do!)
I heart faces Weekly Photo Challenge: Yellow

Here is my contribution to I Heart Faces weekly photo challenge this week: Yellow!
This is R when she was 3-4 months old – can’t believe it is her in that cute little chubby face!

Check out some other great entries here!
here are some of my favorites:
http://torrepinsonphotography.blogspot.com/2011/05/yellow.html
http://danigirl.ca/blog/2011/05/24/ihf-challenge-yellow/
http://www.tflemingphotography.com/2011/05/23/i-heart-faces-photo-challenge-yellow/
My organic vegetable garden is here!
Last week the rain finally let up enough for me to plant my transplants in their new home =)
 |
| tomato plant |
It was fun to be outside for half the day getting this done, although clean up is never fun
 |
| the completed warm weather bed |
I am really looking forward to the fruits of this garden! The idea of having organic vegetables growing within a few feet of my kitchen is so exciting!
 |
| japanese eggplant (i was NOT successful in splitting up these plants) |
I tried something new this time: separating the plants in the pots and planting them apart from each other – which was recommended to me by an experienced gardener. But it seemed so traumatizing! I REALLY hope the plants survive the insult!
 |
These little ones are the onions…with grass cuttings over them =)
 |
| red onions |
Can’t wait to make salsa with these peppers!
 |
| jalapeno and red cherry peppers |
 |
| red and green bell peppers – i though they were the same plant?? |
I’m a little nervous about the tomato plants. Technically they have enough room – 9 feet for 3 plants…but because it is square feet, it just looks so cramped! Hopefully it works out since I am planning on making tons of pomodoro sauce this summer!
 |
| san marzano and roma tomatoes |
The Poppy Dress – By: A Lemon Squeezy Home

A few days ago I was sitting down to make R a hat, when I came across this amazing tutorial to make a “Poppy Dress” for little girls by Christie at Lemon Squeezy Home. I was immediately side tracked reading through her tutorial. It is so great and the dress is so simple!
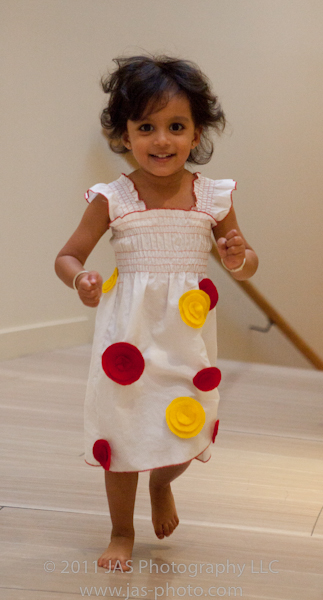
So here is my dress and my little model wearing it! I won’t tell you what I did, since I followed the directions at the Lemon Squeezy Tutorial each step along the way, which you should check out!
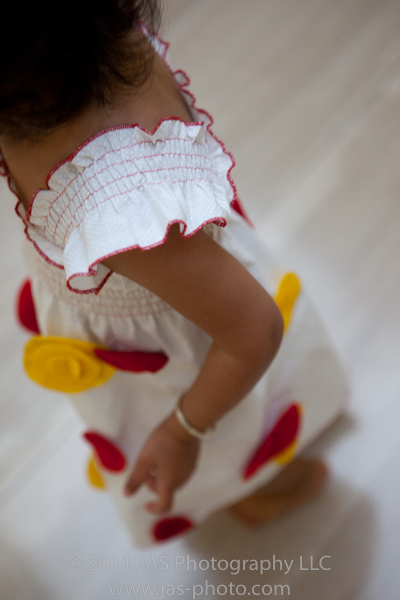
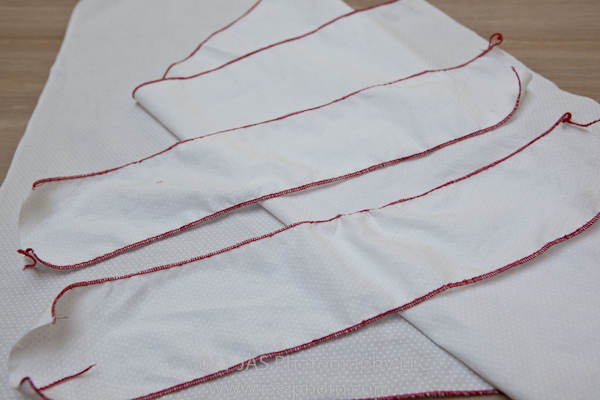
The one thing i did differently: Since I have a new serger that I have been wanting to experiment with, I did a red rolled hem along all the edges of the dress. Overall, I used red instead of orange (although i LOVE the orange in Christie’s tutorial!) because while in Italy, i was completely inspired by the red poppies there.
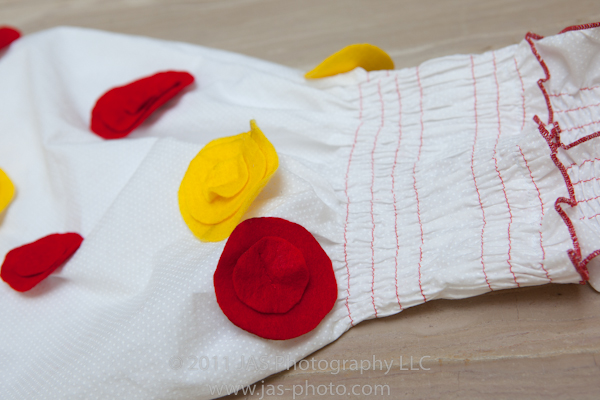
Overall, I’m pretty happy with out it turned out, and R is too (she kept dancing, which is why my pictures are all super blurry and grainy – i had to really pump up the ISO). Besides preparing the flower petals, which was tedious, the sewing took me only about 1 hour. Well…that is AFTER I spent probably 20 monutes figuring out how to shir properly on my machine.

Weekly Photo Challenge: Red (in Italy!)
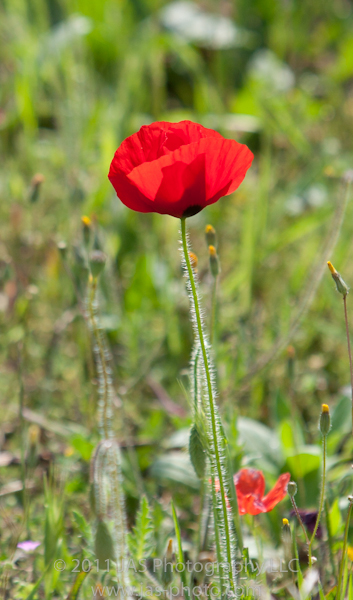
For the Daily post’s week’y photo challenge: Red, I submit “Little Miss Poppy”
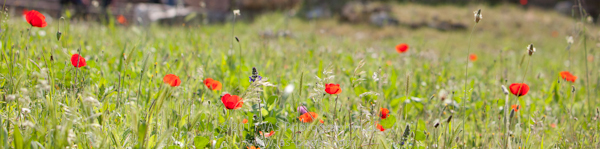
The beautiful red poppies were everywhere in Italy – but mostly on the sides of the railroad tracks (which is why I don’t have more pictures of them…well that, and because I was too busy eating =) They were so breathtaking and every time I saw them, they made me happy.
So here is my RED

Thanks to a kick in the butt by my mother-in-law, i finally got myself to the store to buy more manure compost and top soil as well as transplants for my second garden bed. Actually we all went. I had been procrastinating because i knew it would be pretty difficult for me to get all the soil, plants and tomato wire cages into the car and home and into the bed by myself. Graciously, my mother-in-law suggested we all go Tuesday evening – just in time before the nursery closed. Yay! So with the help of my in-laws, and my husband – and of course my daughter – we were able to get everything home within 1.5 hours, and then my husband and his father put all the soil into the bed and tilled it for me =)
 |
| the warm garden bed – ready to go (almost) |
My plan was to get everything into the bed yesterday…but the weather had something else in mind. It was a torrential downpour. So instead, I took my “before” pictures, and planned out what would go where.
Here is my garden plan and my list of plants and spacings:
 I was struggling a little bit about what to do with the tomatoes. The spacing on the plant posts said 2-3 feet. I was originally planning to do one per square foot, but my mother-in-law who is quite a successful gardener, said she spaces hers out “at least” 2 feet, and thinks less than that would decrease yield. I know that square foot gardening is different than the traditional rows, but I really want a lot of tomatoes, so I was scared to do 1 per sq ft. So in the end, I am in fact giving each plant 3 feet of space: 3 plants per 9 square feet. I’m probably over doing it…but again, I want to make lots of Italian pomodoro sauce (I got a good recipe from a chef in Firenze while we were there!).

The warm bed garden plan
Here are pix of all my little transplants:
 |
| japanese eggplant and zuchini |
 |
| cherry tomato |
.
 |
| my transplants =) |
.
 |
.
 |
| basil |
.
 |
| basil |
Now for some long overdue follow up of my cool weather bed…or as I call it, the “leaf bed” – i.e. I largely get leaves from it. I have thoroughly enjoyed not having to buy any salad and eating TONS of greens from our garden. It is so flavorful! The arugula is by far my favorite – I still get a kick out of how spicy it is! That being said, I’m looking forward to having a garden with some actual vegetables – or at least something other than a leaf to harvest!
 |
| the cool garden bed |
As you can see the garden is pretty full!
 |
| broccoli! |
I never realized how BIG and TALL broccoli plants get! In fact, there is a WHOLE LOT of plant and very little broccoli! It has only been about 2 months…so hopefully more will come. I don’t think I will plant broccoli or cauliflower the second time around, because the yield is so slow. So you end up having much lower return on your time and space investment.
 |
| caulifower |
Speak of which – here are the cauiflower plants. They too are tall with HUGE leaves (*any ideas of what to do with broccoli and cauliflower leaves?) and there is NO cauliflower yet!
 |
| no white heads yet – just big ol cauliflower leaves… |
Hopefully we will actually get some nice big cauliflower heads in there sometime soon!
 |
| cilantro – stalks are getting really big (i cut the huge ones already) |
yesterday I went through and cut all the HUGE stalks of cilantro. They were literally 2-3 times the size of what you see above, and were not producing very much. So I just cut them off – hoping more would grow. the cilantro seeds I planted are actually doing well – so I think I might just pull up these plants and plant seeds in their place. That will give me my 4th crop of cilantro (you can never have too much!)
 |
| radishes – big leaves, still teeny tiny radishes |
The radish leaves are getting big and crowded, and a few of the plants have teeny tiny radishes barely covered by the soil. Not sure if they are just too crowded? But not much yield yet.
 |
| buttercrunch lettuce |
 |
| chinese cabbage |
Haven’t used this as much as I thought I would. I probably won’t include it in my garden next year. I need some more recipes…
 |
| bok choi |
Same with the bok chi – well that’s not true. it isn’t even big enough to harvest yet…but I’m worried I won’t use it just like the chinese cabbage!
 |
| mesclun |
 |
| arugula |
The mesclun and arugula have been AWESOME. Unfotunatley they too are getting woody, spiky stalks with less leaves. I went through and cut all those down too – a couple of them are starting to grow small leaves again. Phew!
 |
| arugula |
.
 |
| spinach – finally getting more leaves instead of just making really big one |
FOr the longest time, each spnach plant would only have about 4 leaves – and as I would cut, it would make just enough to replace what it lost. And then if I didn’t cut anything, instead of making more leaves, it would just make the existing leaves bigger! Not sure what that is about – i.e. if that is the plant’s normal progression or if it is because of something I am or have done. but I’m glad that it is finally starting to make more leaves now!
 |
| peas |
I unfortunately did not get a trelice up in time, and now all the plants are winding around each other – so I think it might be too late to set them up. I am told by my inlaws however, that they can grow just on the ground if I wanted to, so I guess I won’t stress too much about getting the trelice up there.
.
 |
| a little bug enjoying the view =) |
Well that’s it! Thanks for tuning in =)
 |
| first seed planting of cilantro – planted as recommended on package |
.
 |
| second crop of cilantro seed plants – planted per my mother-in-law’s (and experienced gardener) directions: split the seeds in half, soak in water overnight, then plant with barely any top soil covering |
.
 |
| herbs – all doing well except the rosemary…not sure why? |
The Duomo
Next image from Italy:
The Duomo in Florence.
Again, another place that we visited during our honeymoon, but of course had to go again. Unfortunately this time we did not get to climb the dome like we did last time (we are too busy eating!) – but it was beautiful as ever.
 |
| The Duomo in Firenze, Italia. I took this one standing right up to the ropes, and put my camera completely on the floor. It took several tries to get the correct angle and to make sure the center line on the floor was centered. But happy with it in the end =) |
| Canon EOS 5D Mark II EF16-35mm f/2.8L II USM f/4.5 1/40 |
Italy in Infrared
Well, we have been home for a little over two weeks, and I still have not managed to go through all of our Italy pictures!
As I start though, I thought I’d share some with you all =)
We went to Italy for our honeymoon, and although we had 1/100th the quality of camera equipment at the time, we took some pretty good shots. So this time, we weren’t as motivated to take a ton of pictures all over again (although we did carry all 50 pounds of equipment every we went) – partly because our minds were fixated on food and coffee the whole time…oh yeah…and wine!
We did however have our “new” IR camera with us – and that was definitely fun because it was a new way to photograph the sites. Unfortunately we converted our Rebel XT to IR – looking back, we wish we would have converted the 40D so we would have a better quality IR camera. Maybe in the future…
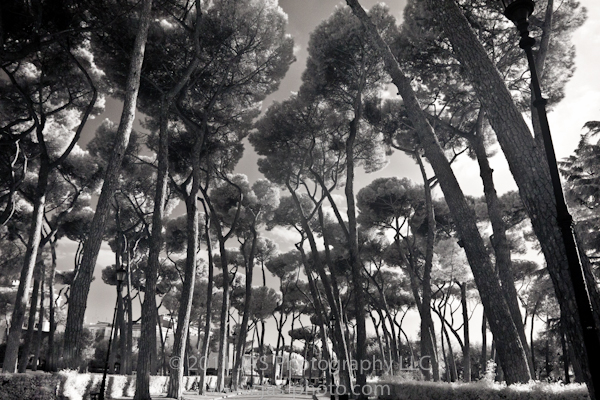
So, here is my first shot to share: a picture from the park at Villa Borghese in Roma. We rented bikes for an hour and rode around the park. It was AWESOME – especially because it gave us a chance to get off our feet, and travel fast enough to have wind blowing in our hair. Love it.
In my wanderings through the internet for ideas of things I want to sew, I came across this blog: Lil Blue Boo. I particularly like this one because she blogs not just about sewing, but all sorts of different crafts. This woman is truly amazing!
Last night, when I was supposed to be sewing a hat for R but instead was printing 18 8×10 prints that were ordered from my last photography session (yay!), I received an email with this post from the blog about yarn art. I was SOOO excited to put it to use to make a present for L’s upcoming Bday …actually it is today – but doesn’t feel like it because it was working all day =(
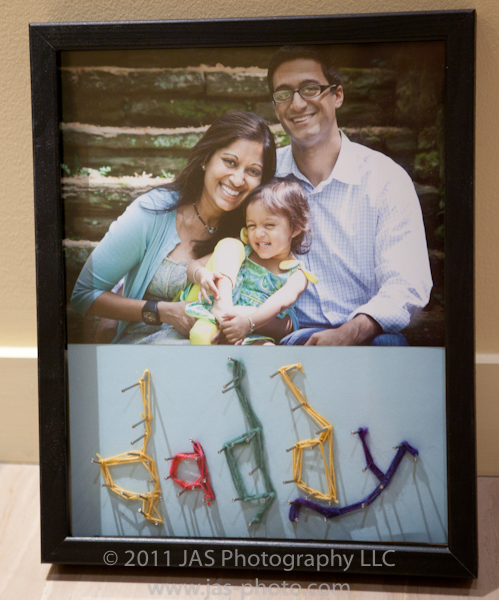
Anyways, I hurriedly tried to put something together for him using this idea and this is what I came up with! It is far from perfect because i didn’t have time to go to the hardware store to buy wood to nail the nails into. I went to AC Moore to get the shadow box frame and was hoping to find something hard there to use – but didn’t find anything the right size. So I found some corrugated cardboard laying around my house (no joke) and used that instead. it is FAR from sturdy, but I figure – it is in a frame and will be on a wall…hopefully it will be fine! This is my problem: when I want to do a project, I want to do it RIGHT NOW. Even if I don’t have all the proper supplies, tools…or even TIME (which is why many of the get done in the middle of the night with less than all the necessary equipment).
But hey – at least I know that about myself now. So now when I go to a fabric store or a notions store or a hardware store, I buy things that I know I might want at some point, and then when I want to use them, I already have them. This is bad because I have to then find a place for all of this stuff – and i HATE that task…but what can you do?
Anyways, check out the Lil Blue Boo blog for directions on how to make one of these babies. I essentially did what she did, but slightly simplified.
Here is a quick description of what I did, sorry I didn’t really take pictures – i was rushing to get this done before L came home for the evening, and I wasn’t planning on making a post about it at the time!
- Using my writing tablet, R and I wrote the word “daddy” in Adobe Illustrator, then printed it the size that I wanted

R's writing on my Wacom tablet in Adobe Illustrator. As you will see, my yarn art is a simplified version of this.
- After deciding what size I wanted the picture and the words, I printed the picture for the frame
- Then had to decide what color yarn and paper backing I wanted to use, and got all of that stuff out. I debated using fabric for the backing instead of paper, but I didn’t want to take away from the actual yarn art, so I stuck with simple paper.
- Taped the color paper to the bottom of the corrugated cardboard which would be my backing for the whole frame
- Placed the printed paper with the word “daddy” on it over the colored paper
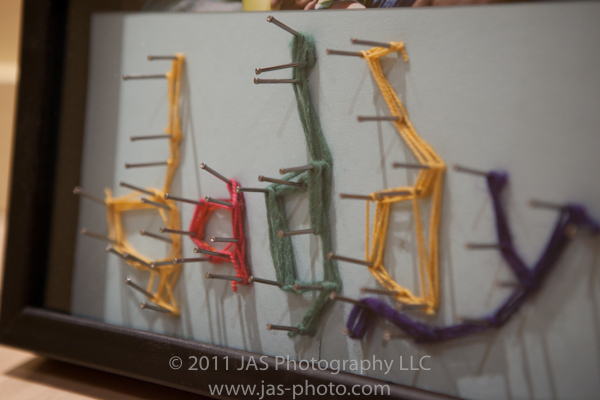
- Hammered nails into the paper and cardboard at the turns in the words (this is the framework for the yarn)
- Removed the white printer paper – since I was nailing to corrugated cardboard which is not that tough, I made sure to hold the nails in place while I pulled the paper off. I had to get tweezers to remove all the paper from the middle parts of the wards and the small pieces left around the nails

Removing the printer paper with tweezers (don't mind my bruised fingernail - closed my thumb in the car door!)
- Then I began wrapping with yarn! This part was fun. In the post from Lil Blue Boo, she used twine – I went with what I had (of course) which is Yarn =)
- Once all the yarn was in place, I put my printed family picture at the top of the backing (used double sided table to secure) and then put it all into the shadow box frame, and I was done!
- Disclaimer – since I was in a rush, I did not have time to devise a way to make this super sturdy. The nails at the bottom half sit right up against the glass – but the top half where the picture is, has no nails to give support, so if you push on the back, it bows in. I am not super concerned because this is going to sit on L’s all in his office and not get handled, but if you are making this, you make want to put something on the sides of the frame on the inside to make it stay more secure. I think there are mo expensive frames that have a side insert specifically for this purpose.


All in all, it probably took about 3 hours – not counting going to the store to buy the frame. It would make a great Father’s Day gift!
Enjoy and definitely check out the Lil Blue Boo blog!
