Hexagon baby blanket
Post updated Jan 30, 2014 with pattern instructions and link to new blog

When I was pregnant with R, I decided I wanted to make her a baby blanket. So I went to a yarn store and bought some carolina blue and white yarn (I’m not into the whole pink for girls and blue for boys thing…) and while I was there, I saw a woman knitting a beautiful hexagon blanket! I instantly fell in love! Well I was new to the knitting scene at that point, so I didn’t feel comfortable asking her where she got the pattern from. Instead I went home and did an exhaustive search online for “hexagon blanket” and finally found the pattern on a blog that is unfortunately now private (I hope I didn’t send too much traffic her way!)
However I think this is pretty easy to find now, if you do a search for “Hexgon knitting pattern” you will find plenty. Here is one pattern I found on craftlover’s blog here:
cast on 30 stitches for each needle, and place a marker for every 15 stitches in each needle (that marks the corner of the hexagon.).
1st & 2nd rnd: knit
*3rd rnd: [K2tog, knit to 2 sts before next marker, ssk ] 6 times.
Work 2 rnds even (St st)*
Repeat from * to * until there are 3 stitches left between markers.
work 2 rnds even, then*k2tog; rep from * around, now 9 sts left.
Break yarn and thread through remaining sts and pull tight and fasten off.
Anyways, way back in 2008 when I was looking for this originally, it was hard to find, so when I did, I was SO excited and got started right away.

Given I was a novice, I didn’t think about the needle gauge or yarn weight when planning my blanket…i.e. I didn’t realize I was using thin yarn and small needles…so it would take me FOREVER! Oh well, it turned out cute and R loves it. She calls it her “special star blanket.”

After finishing the knitting part, I expiermented with crochet (my first time) and crochet’d a little border around the blanket and then hand stitched “UNC” on the corner.

So check out the Dulle Griet blog and the pattern for making the blanket. You can make it for babies or adults! The only change I made was that instead of using DPNs (double pointed needles), I used circular needles to start each hexagon, with markers to mark the sides of the hexagons. This was great because I didn’t have to fiddle with the different needles getting all twisted etc (that drives me crazy!). I would definitely recommend going that way. You will however have to switch to DPNs once the hexagon gets small enough that it will no longer fit onto the circular.
ENJOY and please leave a comment with a link to a picture if you make one so we can all see!

ADS:
My first gardening experience – Lessons Learned
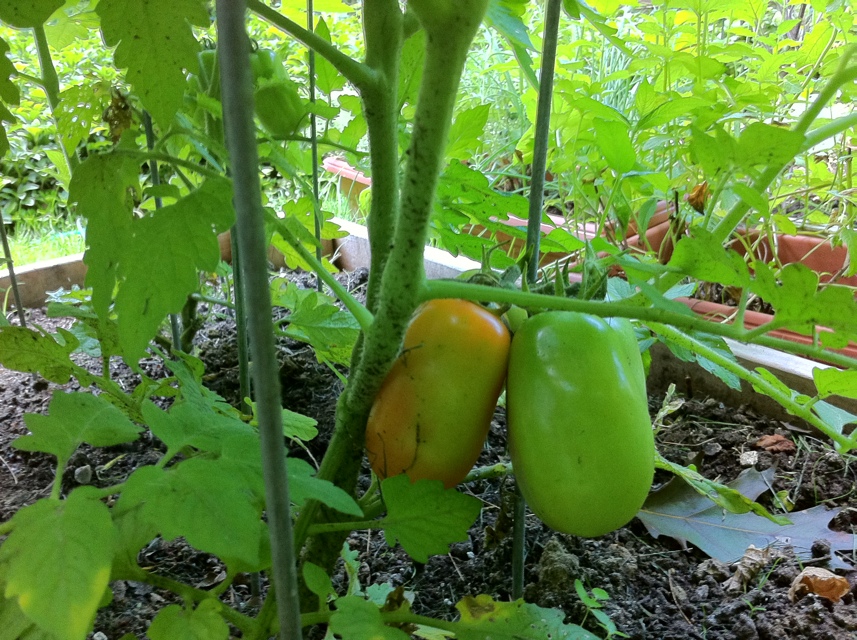
san marzano tomatoes
(disclaimer before I go on: I rushed outside with R after her nap and before dinner, and didn’t have a chance to grab my camera…so we are left with iPhone pictures…)
we went out of town for a week, and I came back to an out of control garden! …it was good and bad…
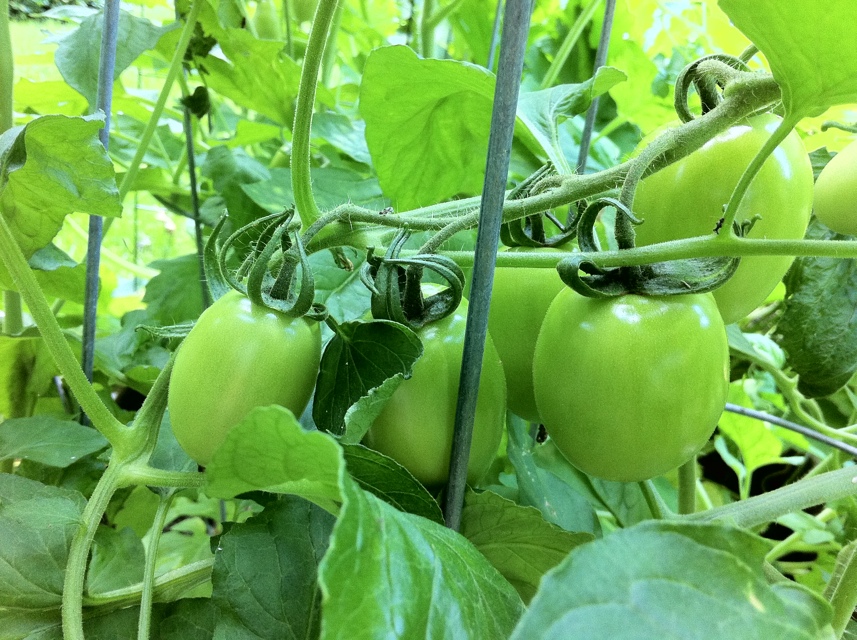
roma tomatos
good because, I now have some veggies ready to eat! yay!
2 cucumbers, a baby eggplant (anyone have any suggestions on what to do with one baby eggplant?) and a red pepper =)
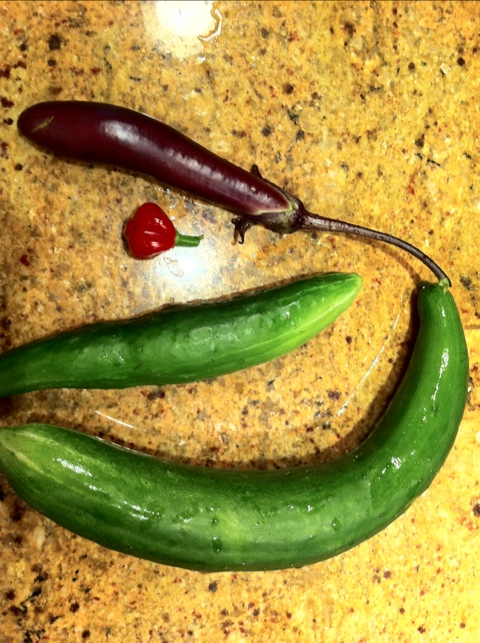
harvested vegetables: cucumber, eggplant and pepper

japanese eggplant
there are TONS of tomatoes growing which is really exciting, several jalapenos, and a couple more peppers. the bell peppers however are not growing yet.
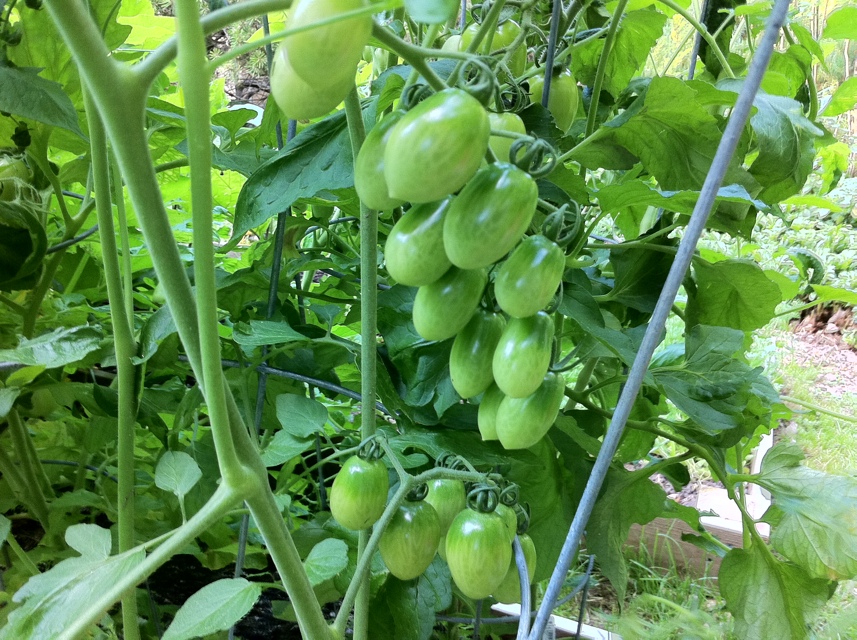
cherry tomato
the bad part: the squash is literally taking over EVERYTHING. it is starting to suffocate my basil. I think I’m going to need to take out some of the squash plant, because the basil is more important to me than squash!
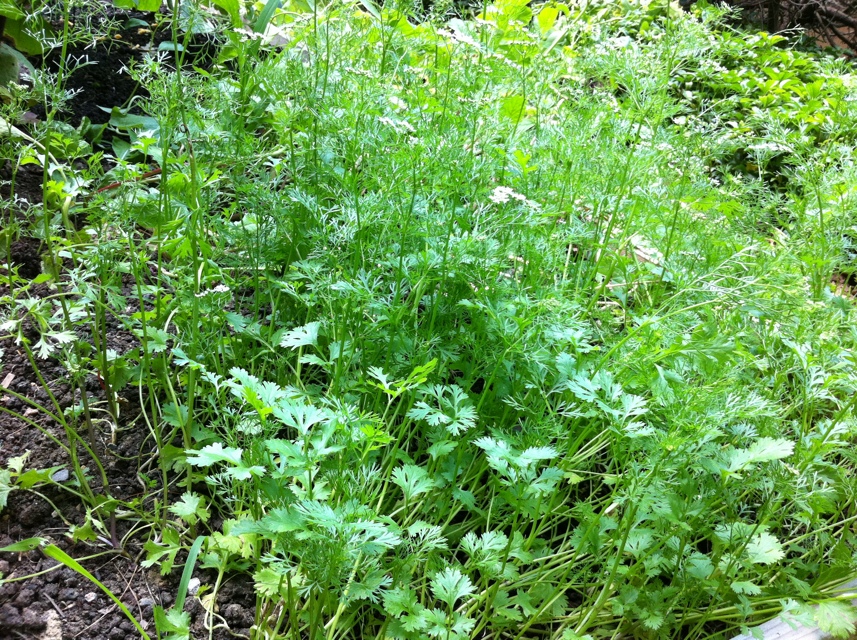
cilantro that has already bolted
I also need to go out today and harvest all of this cilantro, since it is flowering and it is way too hot for it to grow right now. I think i’m going to buy more basil plants and fill in my empty areas with them. and then make pesto with all my basil!
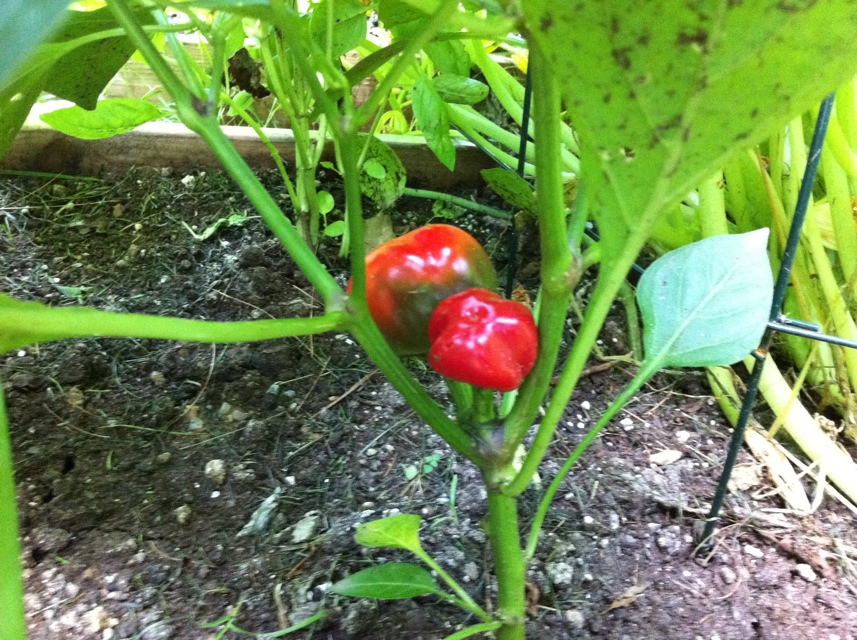
red cherry peppers
so lessons so far:
1) do not plant squash in a square foot garden – there is just not enough space
2) plant things that need frequent harvesting, like basil, in the outside areas so they are easy to get to (my basil is in the hardest place to reach)
3) plant cucumbers on the edge of your garden where they can grow up on a trellis or other structure
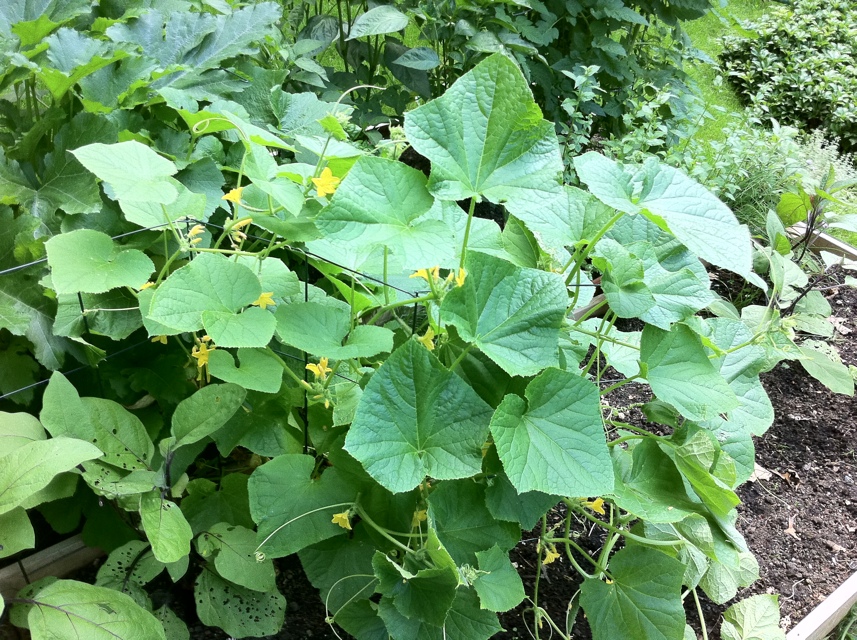
cucumber vines
4) when growing peas, train them onto a trellis early. If you wait to long like I did, then they will get all tangled and many of them may die =(
5) when planting radish, do NOT over crowd them – they will not have space to grow (I got lots of radish leaves and flowers, but no radishes)
6) eggplants are usually plagued by beetles…be prepared.
7) if planting cilantro from seed, you CAN over crowd. Just sprinkle them out over the area and barely cover them with soil. It is best to first soak the seeds overnight in water and if you can, use a brick or stone to VERY LIGHTLY break the seeds in half. I know it sounds crazy, but my mother in law has been doing that for years and it worked beautifully.
8) Don’t leave broccoli on the plant too long…it will start to flower!

jalapeno peppers
Well that’s it for now…
Hope everyone else’s gardens are going well!
4th of July Apron!

When I went to Joann’s once, I saw this $3 plain beige kids apron and put it in my cart. Then I, of course, promptly thought: “I can make that!”
So I took note of what it looked like and how it was constructed, and made one for R – out of her favorite: American Flag fabric.
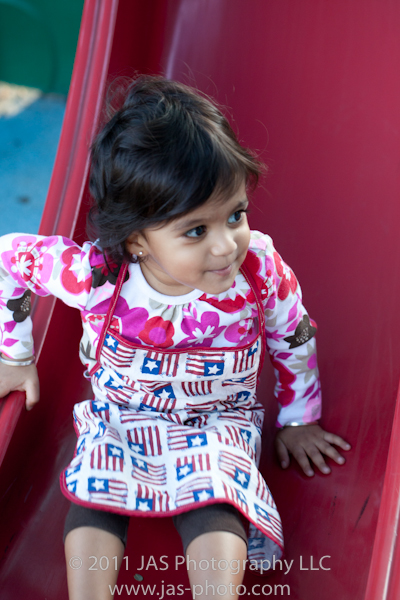
She insisted on wearing it out to the playground, which of course made me happy…until I realized that we lost it.
So I’ll have to make another one and when I do, I’ll take pictures and put up a tutorial afterwards. I can say this much – it was VERY simple, took about a 1/4-1/3 yard of fabric and some double folded bias tape. That’s it.
Hope everyone had a GREAT 4th of July!
My first upcycled project

I finally did an UPcycled project of my own! I converted a small t-shirt of mine into a new dress for R.
I pretty much winged it. Which was fun, and I think good for me to do in terms of learning different things about what works and what doesn’t.

So I started out with my shirt and some elastic I bought off of Pick your plum (fun stuff!)

Checked to see how much I needed to take in the shirt to make it fit my SKINNY MINNY

And I went for it! Cut, cut cut!

This is what I was left with. I wanted to keep the sleeve attachments intact so that it would make it easier to complete =)

Since I recently explored how to shir, figured I’d tighten up the sleeves and neck with elastic thread. Quick and easy.


Then just added some elastic as an empire waist to cinch it up.

And used the beautiful serger to do a rolled hem along the bottom with a tight tension to make cute little ruffles.

And then used an old white t-shirt to make flowers!

I think R liked it!

Only thing I’m not a huge fan of is that you can see the seam on the inside of the collar.


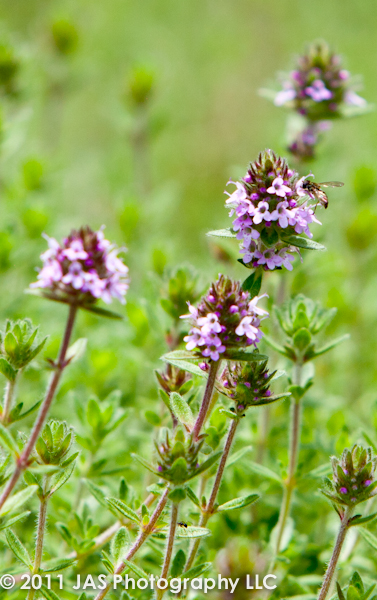
More flowers from our trip
apparently I have a thing for taking pictures of flowers…


I have a friend for whom I have been wanting to make a stuffed sea turtle…but it seemed like a very difficult task that I was having a hard time starting… i just hadn’t made anything as complicated before, so I was scared to start!

But then, I saw THIS amazingly well timed post at by make-it-and-love-it for making stuffed turtles! So I thought – AWESOME! I can just base my construction off of this tutorial, and draw my own pattern pieces to make the turtle into a SEA turtle instead of a regular turtle!
So that’s what I did! And here is what I came up with:

So if you like what you see, here is the FREE printable pattern (print on regular 8.5×11 paper):
(Please note: This Pattern is only for personal use. It is copyright protected and not available for commercial use without expressed permission from JAS Photography LLC. Please email info@jas-photo.com if you would like a commercial license for this pattern)

and then go to make-it-and-love-it and check out her tutorial for how to put the turtle together!

Pattern pieces
Just a couple notes of what I did differently:
1) Of course, I used different shapes from my own pattern pieces

Shell and stomach fabric pieces cut out
2) I did not make a tail (in all the pictures I looked at online, i never saw a tail on the sea turtles)

Arms, legs and head pieces cut out
3) Instead of sewing the head of the turtle in between the shell pieces, I made mine flat and sewed it in between the shell and main body piece – just like you do the legs.

Arms, legs and head of turtle after stuffing and sewing shut
4) Once I sewed around the edge and turned the turtle inside out, I did not sew the opening closed by hand (i usually try to avoid that if at all possible). Instead, I top stitched another seam around the edge of the turtle, and in doing so, i sewed the opening closed. I thought this worked well for the sea turtle because their shells seem to be more flat anyways!

That’s it!
How cute is it!?! I hope you like it – it makes a GREAT baby gift!


(Please note: This Pattern is only for personal use. It is copyright protected and not available for commercial use without expressed permission from JAS Photography LLC. Please email info@jas-photo.com if you would like a commercial license for this pattern)
Cute stuffed elephant (Free Pattern!)

I made these cute little stuffed elephants (with the help of several family members!) for the gift bags for my daughter’s first birthday party last year, and thought I’d share the pattern!

(Please note: This Pattern is only for personal use. It is copyright protected and not available for commercial use without expressed permission from JAS Photography LLC. Please email info@jas-photo.com if you would like a commercial license for this pattern)
You can download the elephant pattern here.
To make the elephant:
1) Gather supplies: Fabric pieces – You can have fun with using totally different fabrics, or match one ear to the other side of the elephant and vice versa.
- you need 2 body pieces,
- 4 ear pieces, and
- a small strip of ribbon for the tail (~2 inches long)
- 1-2 bells and a small hard container to put them in that can fit into the elephant (optional, to make the toy a rattle also)
2) Put 2 ear pieces right sides together, and sew along the curved edge from one corner to the other (leave the straight edge open)
3) Repeat for other 2 ear pieces
4) Turn the ear right sides out
5) Sew an ear onto each body piece. I first positioned the ear how I wanted it to sit, then flipped it over along the straight edge and sewed that into place. Then flipped the ear back over and did a second stitch to secure it.
6) Once both ears are in place, put both body pieces with right sides facing, and sew along the entire edge leaving a 2 inch gap open at the bottom to turn it (i left the area between the legs open). Some curvier areas are tricky, so sew slowly on those spots. For the tail, fold the ribbon in half with wrong sides facing. Then put it in place at the elephant’s bottom, sandwiched in btween the two body pieces, and line up the raw edge of the ribbon with the raw edge of the fabric (or you could let it stick out a little bit as well). When you sew the edge over the tail area, back stitch several times to make it secure.
7) Turn right side out and stuff! If you want to add the bells – do it now.
8) Once it is all stuffed, sew the bottom closed by hand, and you are done!

Hope you enjoy it – it makes a great gift for a new baby too!
(Please note: This Pattern is only for personal use. It is copyright protected and not available for commercial use without expressed permission from JAS Photography LLC. Please email info@jas-photo.com if you would like a commercial license for this pattern)
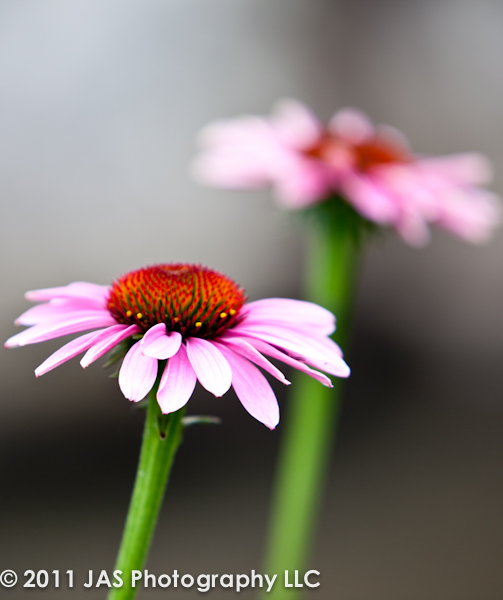
Flowers from today
Saw some beautiful flowers today, thought i’d share…


My Hindi Alphabet Video is now available for free!
Last year I made this 25 minute video that goes through the hindi alphabet with sounds, pictures and animations to teach R the hindi alphabet. For a long time afterwards, the only way I could get her to eat anything was by showing her the video! It was pretty cool.
Well, I put it up online for sale a while back, and have since decided to make it free for everyone. I don’t really need to make money off of it…and I’m not anyways =)
So, it is available for all who would like it! Here’s a little clip:
Just go to my website: http://www.babyculturecards.com, and click on the link to download the video. It is long (~112 MB) so will take a while. But once you have it downloaded, you can import it into iTunes and play it on your iPhone or iPad, you can also play it on pretty much any computer! I am working on editing the video to add english translations, and then next will make a gujarati version. I am also looking into make this into an app…but not sure if there is a point yet since you can download it and put it on your phone that way.
Anyways, enjoy and please spread the word!
Handmade gifts for R’s teachers

R finished her first year of school this year (can’t believe it!). And her teachers were amazing – so I wanted to make them something special as an end of the year thank you.
Thanks to Grosgrain’s month of free pattern giveaways, and Rae’s contribution of a Chevron wristlet tutorial, I made these cute little wristlets for all three of them!
I used random t-shirt scraps and some ric rac to embellish the outsides, and I used a fun contrasting material to line the inside and make a nice sized pocket for credit cards or keys etc.

I also printed a 4×6 picture of R and mounted it on a cute stationary and wrote “thank you” on it with R’s help. That gave the whole thing a nice personal touch!
I know it’s late for teacher’s gifts, but thought I’d share!
Check out grosgrain here and rae’s tutorial here!
