IHeartFaces: Best Face Photo 2011
I Heart Faces has started their weekly photo challenges again – the first one for 2o12 is “Best Face of 2011”
The is one of my favorites that I took this year. I just like that the picture captures a very natural look on his face!
‘
Check out some other great entries here!

Check out Sweet Shot Tuesdays below!

Friday Freebie – Little Einstein Cupcake Toppers
Little Einstein Birthday Cupcake Toppers!

Well, preparations are well underway for our [mini] Little Einstein Mission/Celebration this weekend! A couple of R’s friends, and then a BUNCH of uncles and aunts (our cousins) are coming over to celebrate, and I’m so excited!
I started my 3rd trimester this week, and have been feeling EXTREMELY exhausted. I mean, I run one errand for 15 minutes and have to rest. Ugh – not convenient!

But I have managed to finally put together some plans for the mission, including an actual mission that R can go on! It will be a lot of decorations and a lot of work for a very short amount of time…but I think she’ll like it =)
Anyways, because I can’t help myself, I have made cupcake toppers and other decorations for the party (only a couple) and thought I’d share here. I’ll probably do a full party post with descriptions of our activities etc with lots of downloads (like my Elmo Party Post), but that will be later – sometime next week. So in the meanwhile, enjoy these cupcake toppers!

LITTLE EINSTEIN CUPCAKE TOPPERS
How to use:
To use these labels, print them out on Avery 1.5 inch circular label paper #8293 (or you can use blank label paper or cardstock and use a paper punch to cut them out).
They are sized to put over a 2 inch scalloped circle. So you can put the white label with the character, on top of a 2 inch scalloped colored cardstock, and sandwich the toothpick in between. If you want to make them double sided, just add another character sticker to the back of the colored cardstock!
Enjoy!
Make your own address labels with a flare!
This year, I decided to make a new type of address label that I have been seeing around and really like!
‘
They are long rectangles which wrap around from the front to the back. No real “use” in this, it’s just different, so I like it =)
‘
Making these is REALLY easy. And they would be a great addition to your Thank You cards for all the wonderful gifts you got this year (or at least for your kids!)
‘
1) in Photoshop (other programs would work also – like Word, or Illustrator) make a new document or object that is 8 inches wide and 0.67 (or somewhere close to that) tall.
2) on the Right side of the object/document, put in your address. You can also import a picture or other design for the background. This part is essentially your return address label. You can really make it as wide as you want – I made mine about 2.5 inches.
3) On the left side of your object, put in whatever picture/graphic you want to use to dress up your labels! I wanted mine to match my holiday card, so I actually took a screenprint on my computer of the card from the order screen, and then inserted that picture onto the label. Then I just copied and pasted the same picture 3 times in a row. That way it matched perfectly. You can put in whatever you want – you can also keep varying them for whatever mood you are in!
4) That’s it – then you just print them on label paper! I use Lightroom to do the majority of my printing – but you can use whatever is comfortable for you. As far as the page layout, if you use the sizes I described above, you can put 1 column and 15 rows of labels in portrait mode on a letter-sized sheet of paper. That allows for margins that most printers can handle.
5) To apply the labels straight, I found it easier to start on the back of the envelope, and line up the longer part of the label with the top of the envelope.

I actually set it down probably 1-2 mm, but I just eyeballed this. You have to make sure that as you do this, you line up the right edge properly so that the return address part folds over nicely to the front of the envelope.
‘
Once you have secure the back, then fold over the right side of the label onto the front of the envelope, and you are done!
‘

Word Template for long rectangular return address labels. Click on the image to download the word file.
You can also download the free “thank you” stickers I posted here to add to your cards/envelopes.
Well, I hope that gives you some fun ideas for something new you can make and spice up your thank you cards with!

Fun with painting
My girl has a thing with being clean (yes, you can blame me) – so up until now, she usually never likes to use her fingers for fingerpainting. But today, she actually enjoyed getting it ALL over her hands and making handprints! Over and over and Over again! She probably covered about 10 sheets of paper with handprints – all of them red =)
Meanwhile, I was revelling in the fact that she was actually letting her hands get dirty. It was great!
So those are my pictures for today!
‘
‘
‘
‘
‘
Little Einstein’s Party!
R’s birthday is coming up in 2 days, and I am just finishing up a week of work…which means I am just NOW trying to figure out what I am going to do for her mini birthday celebration! The theme is Little Einsteins. I have found some cute stuff online that I am getting ideas from (check out my pintrest boards ![]() )…but would love to hear YOUR ideas if you have any!
)…but would love to hear YOUR ideas if you have any!

Source: etsy.com via Subha on Pinterest
So far, I am thinking of trying to put together a “mission” for them to go on. The key is, what will the mission be? I think I’m going to find music and art related objects and have them find them. But I think I need to decorate certain areas/rooms to look like a place/climate so they feel like they are somewhere different. One of my pins from a party website suggested making an antarctica room, a safari room, a beach room and a dessert room. I’m not sure that I can pull all that off, but i’m thinking about it.

Source: etsy.com via Subha on Pinterest
The other idea I had was trying to incorporate the speeds that rocket flies, since R likes to use those words (Adagio, Allegro, Moderato, Presto) when referring to how fast I’m driving or how fast she is walking. o maybe musical chairs where I can speed up and slow down the music??
.
Thoughts? Ideas? Please share!
And finally…
In the spirit of a picture a day (when possible…), here is a cute little video clip of R dancing to music from a toy that her Mosi bought her for Christmas this year (click on the link below)!
Great day
Had a great first day of the year with R and L. R has been in such a great mood the last several days, it makes everything more enjoyable! I have been working, which is why I have been slacking on the blogfront.
There are many blogs out there challenging people to do a once a week or even once a day photo challenge for 2012. I sadly was not able to keep up with my simple beauties blog challenge so I have decided not to “commit” to anything. But I figure when I can, I will participate and post some pictures. Since the biggest obstacle seems to be getting to my computer, downloading pictures from my camera and then uploading to WordPress, I will probably be adding alot Of pictures taken from my phone! Better than nothing, right?
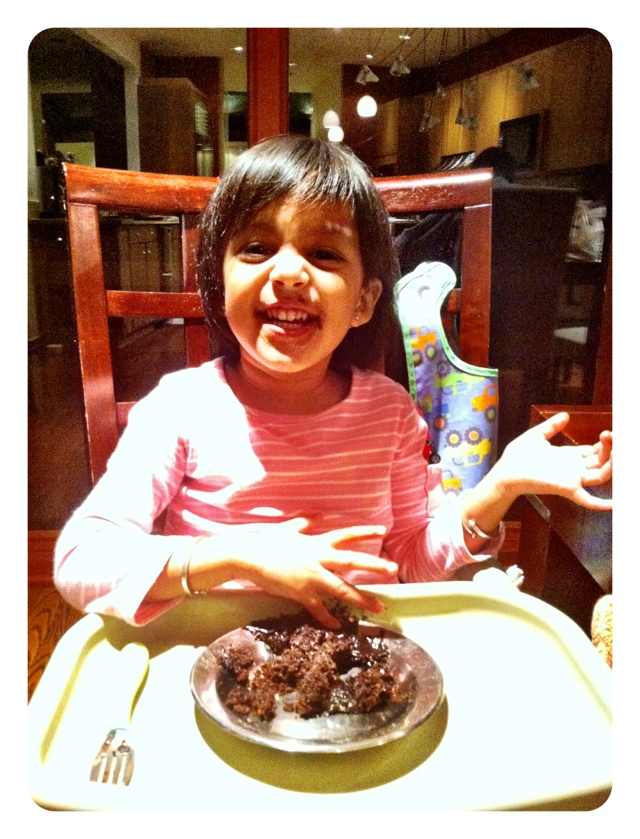
So here are my pictures for today – they are of R thoroughly enjoying chocolate muffin…or at least the chocolate icing on it. I indulged her and let her make a mess with her hands because I figure – how much longer will she actually get enjoyment from that?!


A glimpse from our holiday card
We have some great pictures of R this year as she blossoms into a smart and beautiful girl!
Thought I’d share a couple of my favorites!
‘
‘
‘
‘
‘
‘
‘
‘
‘
‘
‘
‘
A great teacher’s gift idea!
Thought I’d share an idea for teacher’s gifts this year:
Personalized Journals!
‘
I ordered one for each teacher (from http://www.minted.com) with their name on the cover and the year.
‘
Then on the inside cover I put a picture of R, wrote “To Ms. ____, Love R” and then put an inspirational quote about teachers!
You can find lots of quotes on line – just do a search and you’ll be overwhelmed!
‘
Well I think they were a big hit….so if you are looking for something to get, try this!
Photo Tip of the Week (PTOW): Experiment!
Many times I find that I take a picture during a photoshoot, and when I look at it on my computer, I’m not completely impressed.
But then I play around and experiment a bit – trying different filters, different color temperatures (and cropping!) and other cool effects and often find a version of the picture I really love!
BEFORE: 
Just like with this picture! The top one is a cute moment, but the colors are distracting, as is the window. Since I knew that it was the feeling of the moment I wanted to capture, I changed the picture to black and white and it completely changed the entire image! I did a couple of other adjustments, but perhaps the other one I use the most is “Post Crop Vignette.”
AFTER: 
I vignette the heck out of my pictures and I think it makes a really dramatic effect which people love.
So, if you have some “not so great” pictures you have had a hard time bringing yourself to delete, play around and see if you can turn them into something you love!
And of course, have fun!
IHeartFaces: Furry Friends
Here is my “furry friend” when he was just a wittle baby! He is a BIG BOY now, but I love looking at his pictures when he was this age and full of energy!
‘
Check out some other great entries here!
