Say AAAAAAAAHHH!
This week’s photo challenge at IHeartFaces.com is the letter “A.”
So this is my little niece saying “AAAAAAAAAAAAHHH” for her beloved rattle!

Check out some more great entires here!

Our attempt at Maternity pictures
As I mentioned, this weekend I had my “OMG” moment of realizing how close we are to the baby coming. So I told L that we HAD to take some pictures this week!
Here is one that I like..I still have to look through and edit the rest. Unfortuantely it is very much winter here so the grass is ugly and there is barely any green around…and you can see all the neighbors houses through the bare branches…but at least we can see the baby bump!

I’m hoping to get a few more pictures – standing form the side, and with R and me. Hopefully we can make it happen!
Project #1: The Growth Chart
Ok, so I have finished designing my growth chart!
I am waiting for my photo paper roll to come in so I can print it…but here it is:

I made the whole thing in Adobe Illustrator – drawing everything from scratch. That was not my original intention…but that’s how it goes, right?
I’m going to use that graphic at the top of the 4 elephants (supposed to be our family) on our birth announcements and thank you cards as well.
I got the idea from this card:

As you can see it is similar, but not exactly the same. Hmmm…Maybe I’ll make the baby elephant yellow like in this one…I like the way it stands out…
I couldn’t resist making the hearts as well. They add a really cute, whimsical touch!
I actually had a slightly different version I was working on as well:

But then I decided I wanted our 3 year old daughter represented in the graphic as well. Even then, I first drew a second elephant with its trunk curved down as well, but then changed it to make the slightly larger sibling with her trunk above the baby to make them stand apart.
This was my original plan:

And then I tried to put an elephant in their trunks kind of like a cradle, but it didn’t work so well. It looked too stiff, and I couldn’t really figure out how to make it look like it was cradled or sitting…I guess elephants don’t really sit, do they?

I hope it turns out well! I’m debating putting a texture effect on it in Photoshop to make the elephants look a little bit more worn…but I’m not sure…we’ll see!
Any suggestions for changes before I print??
Getting down to business

34 weeks. yesterday.
!!!!!!!!!!!!!!!!!!!!!!!!!
I can’t believe it! I have been thinking…”i have time”…not so much! Especially considering that I started having contractions 6 weeks ago…eek!
Ok, so that kick in the butt finally got me to pick out a nursery decor idea. I didn’t really do that for my first (isn’t it usually the other way around?) For her, we bought a crib set we really liked, painted the walls yellow, and then painted a whole bunch of paintings for the walls. I was pretty happy with it.
But this time, I for some reason feel like picking a color scheme and trying to keep things matching.
My theme you ask?
GRAY AND YELLOW…mainly geometric patterns with some elephants
Here are some examples of nurseries that I really love and am using as inspiration:


I also love these tree decals in this nursery behind the crib:

I found a similar one on etsy that I think I might get:

As far as other things I really like that I am thinking of trying to tackle in the next couple of weeks…
CRIB SET
I am in LOVE with this crib set from

And I think I’m going to get the bumper and the crib skirt. I already ordered a yellow crib sheet from amazon (much cheaper!)…hmmm…maybe I should have ordered two…

They also have some other coordinating items.
I’m thinking of getting one pillow…

…but I think I’m going to make my own drapes and just buy the fabric from them. I think I’ll accent with some yellow on them as well.
![]()
Land of nod also has some cute drapes:

I’m also planning on making a changing pad. I checked out one of the ones I have, it looks super easy! I might make it in yellow dimply soft fabric, as well as the chevron.

GROWTH CHART:

Unfortunately this one was custom made for the owner of the blog (click on the picture to visit)…so I’m going to make one myself as well. I have a printer that can print 13 inch rolls, so I just bought a roll of premium photo lustre paper, 13 inches wide, and am going to design my own grown chart. Then I’ll just have to fashion something at the top to hang it! I’m really excited and am largely going to use this one as my design inspiration. I’m down to the wire here, so I don’t have time to re-create…I’ll probably use elephant drawings I have already done and tailor them to look like this…
GLIDER
Carousel designs has some rocking chair pads, but they are way too small for my glider. I went to dutalier.com to see if I could order some new cushions and save myself the effort of making new ones, but they don’t have ANY fabrics that I like. SO…..I think if I have time, I will make new covers for my existing cushions…yikes! I think most of them will be straight forward except for the arm covers.

MOBILE
I am already more than half way done with a bird mobile I was planning on making. I got the idea from a local fabric store:

But I have made birds of all different colors, because it was way before my revelation of how I want to do the nursery!

I really like this one…but am thinking I might make one myself with really simple 2-D elephants that are gray and yellow:

KNITTED BLANKET
I started knitting a blanket a while ago, and LUCKILY i bought gray and yellow yarn for it…yay! The pattern is from Martha Stewart:

Source: marthastewart.com via Subha on Pinterest
I am about 1/3 way done with the blanket, so hopefully that will be completed soon.
Lastly, I am planning on making a quilt. Yes, my
VERY FIRST quilt
A little over zealous you think? Yeah, me too…
I just ordered all the fabric last night:


I am kinda winging it with the pattern. I am planning on making the front different size rectangles all put together in rows, and the back I was thinking of doing wide rectangles that go all the way across thew width of the quilt, using 4-5 different fabrics. Then I will use the yellow polka dot fabric for the binding.
HOWEVER, I did see this blanket on etsy

And may make something like this – i.e. no batting, just a soft underside. Since I have never quilted before, I feel like this might be more manageable in my short time period. Maybe I’ll at least start with something like this and then move on to a quilt later! I have yellow simply dot fabric that I can use for the back instead of the charcoal gray, which I think will be a more fun!
ANNOUNCEMENTS
I am also trying to plan ahead for my baby announcements. I foiund a design I like online, which matches my theme pretty well. I’l probably make some version of this – not exatly the same and get it printed myself. Just trying to decide where I’m going to print. I.e. fedex office – in which case I’d cut myself to save money…but will there be time? Or vistaprint.com – in which case it would have to be glossy postcard size. We’ll see…

Or I might even get them printed as 5×7 photo prints. I think if I get them printed from a professional company like mpix.com they will look substantial enough to stand on their own…
BOOK SLING
Oh yeah! I LOVE this book sling on the Domestic Adventure blog. Definitely have to make one of these:

And will also make some wall art:

Well, that’s it for now! You can follow my nursery board on pintrest to see what else I’m thinking of…
![]()
If you have any ideas or anything to recommend, please let me know!
Thanks!
IHeartFaces Photo Challenge: Hugs & Kisses
This week’s photo challenge at I Heart Faces is “Hugs and Kisses”
I love this theme because I love seeing how happy people are in the pics!

Check out some more great entries here!
Easy Vinyl Bags by Lil Blue Boo
If you are Typa A like me, you might wish you could put everything in a little baggie to keep things all organized =)
My husband often jokes that if I could put him in a tupperware box I would…hmmm………………
=]
A while back Ashley from Lil Blue Boo posted a tutorial about how to make quick and easy vinyl bags. Well, I finally got around to making them!

Here’s my version! Check out her tutorial here. The main difference between mine and hers are that I used double fold bias tape for all the edges instead of the elastic. Only because I had a lot of inexpensive bias tape I bought from Pick Your Plum, and I didn’t want to use up all of my elastic!

I love these bags because they are clear, so it is easy for R to see what is in them and decide if she wants to play with them or not, AND they don’t take a lot of space!
Look at this picture above – I used to have these little spiral art thingies in that gold box (only because I didn’t have anything else to put them in) and now I have them in a bag that is way more compact. And you can actually see what is in it! I don’t know how many times I opened that box saying “what is in this thing??”

And really, they are quick and easy. I made all of the ones you see in the first picture in one afternoon – actually less than one afternoon. Probably 2 hours?
As you can see in the first picture, I made a lot of different sizes to fit different things. In fact, I might use some of the smaller ones for my “toys” =)
I also made a really wide one, and put 2 elastics on it 1/3 of the way in from each side for larger toys.
So if you wanna make some, buy a vinyl shower curtain or table cloth, go to Lil Blue Boo’s tutorial, and get started!
Have fun organizing your hearts out!
Severe Procrastination – Valentine’s Day Cards
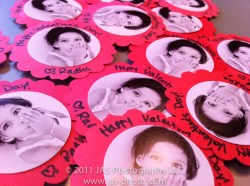
This picture was taken on February 14, at 7:45AM. 45 minutes before I needed to leave to take R to school.
And yes, they are meant to be Valentine’s Day Cards!

I was thinking I wouldn’t make any this year, but then this morning I was thinking: “What if everyone else makes some and R feels left out?” (Did I ever mention that I think motherhood = guilt?)
So, I rushed around this morning, printed a sheet of pictures, used my handy dandy paper punches, and made these cards for her to give to the kids at school.

Hope they like them and hope she has FUN!
Happy Valentine’s Day Everyone!
Photo Tip & Friday Freebie/Tutorial: Clipping Masks & Free Photoshop Album Template Download
Well, after 6 days of spending all day on it, I have FINALLY finished my 2011 Family Album!
I can’t wait to get the finished result and will definitely show pics once I do.
Here is the cover:

And a sample of one of the pages:

I decided to go with blurb.com for publishing the book. They seem to have good printing, I was able to upgrade my page quality to a matte/lustre finish which I like better than the standard paper, and it looks pretty professional. Another cool perk is that for $2, I was able to instantly download an epub version of the book to my ipad! It is especially cool because I could send the link to my family and they are able to download it as well – so everyone can enjoy the album!

So, how did I make the album?
Here is where the Friday Freebie comes in: I used photoshop to make templates and then used the clipping mask feature.
What in the world is a “clipping mask” you ask?
Photoshop works with layers. The cliipping mask feature works with those layers – you create clipping mask of one layer (the upper layer) to another (the layer immediately below it).
What it does, hides all parts of the upper layer, except that which matches to whatever is on the lower layer.
Ok, a little confusing…let me show you some pix.
In the picture below, you see an image in photoshop with 2 layers: the bottom layer is the plain white background. The layer above it has the gray square, and the rest of it is transparent.
![]()
In this picture you can see the layers.
What I want to do, is insert my picture (layer 3) that you see below, but make it show up only where the gray square is.
When you make a clipping mask from layer 3 to layer 2, the only part of layer 3 that will show is whatever is OVER the gray box on layer two. It doesn’t matter what color the shape is on the lower layer – it just looks for any non-transparent pixels, and shows that part of the upper layer.

As you can see in this picture, if I show layer 3, it takes up a lot of the canvas, and is not fitting into the gray box.

If you right click on layer 3 (the one with the picture), you get this menu:

and you choose clipping mask. Or, the faster way, is to use the keyboard shortcut: alt/option + command + G
That will clip the layer you are on, to the one below, and your layers panel will look like this (you see the layer thumbnail indented to the right with a little arrow pointing down) :

and now our image looks like this:

That’s it! Once you have clipped the layer, you can resize the layer with the picture on it to make it fit into your clipped section better. To do this, I use the free transform option (command + T, or you can go to Edit -> Free Transform) and resize it however you want. If you hold down the shift key while you resize your picture from the corner, it will keep it’s original proportions.
That’s it! That’s how I made my whole album! I first downloaded (bought) a few templates from Album Cafe, and then once I understood the process better, I made my own templates.
So the freebie for today, is the following template:

Right click on the image to save the link (the .psd file) for the photoshop template
Right-click on the image above to download the PSD (photoshop) file to make this page.
So to recap how to use it:
1) Open the file in photoshop
2) Bring pictures into photoshop that you want to put on the page. Make sure that whatever picture you want to correspond to the appropriate picture holder, is immediately above that layer.
3) Once you have the picture layer above the shape layer where you want it to show up, use the clipping mask feature (right click on the layer and choose “create clipping mask” or press alt/option + command + G). To try to make this easier, I have numbered the different picture holders and matched that to the layer number.
4) Then use the free transform feature (command + T) to move and resize the picture however you want it to look on the page. Make sure that when you use free transform, you have the picture layer selected that you want to edit.

If you have any questions or it isn’t working, feel free to ask!
Hope you enjoy!

IHeartFaces: The Letter L
This week’s photo challenge at I Heart Faces is the letter “L”
So this is our (my R and me) interpretation of L!
‘
‘

PTOW: Join National Association of Photoshop Professionals (NAPP)
In December, I took a course on Lightroom in downtown, and learned some cool stuff. But the bigger thing I did while there, was join NAPP: The National Association of Photoshop Professionals.

I always thought it sounded kind of silly, and I didn’t rally understand why it would be good…but I talked to other photographers at this course, and ALL of them were members and happy with their benefits. So I said, what the heck?
I bought a 2 year membership – along with a 1 year subscription to Kelby’s Online Training (I’ll talk about that separately) and I have LOVED it. It has been SO AWESOME!
The best part: The Educational Videos

Here is an example of the simple help videos – I searched for “actions” and got all of these choices. These are great, short (2-3 minute) videos that explain whatever you have searched in photoshop. I have learned so much in watching these videos – photoshop is like a new program for me!

Plus, there are lots of resources for Lightroom users as well.

In case you are wondering, no I do not get ANY money or sponsorship for this post. I just think it is a really great resource that I didn’t know about, and so want to share with everyone.
Oh yeah – there are also all sorts of discounts and other things available for NAPP members. So always ask when you are buying photography equipment.
If you are not ready to buy a membership yet, and own an iPod/iPhone/iPad/Apple TV – check out some of the photography podcasts created by some of the NAPP educators. I just did a search for “NAPP” and got several free ones which have really been great. I have used what I saw in a couple of the videos in the last several days dozens of times already!
Well that’s it, short and sweet today. Check it out!
