Art not so ordinary. Part 4.
Day 4. Black and white day.
These first three pictures are abstract black and white patterns created from buildings in Chicago. For each of them, I obviously first made them black and white, then turned up both the exposure and the blacks to give them a more high contrast look.


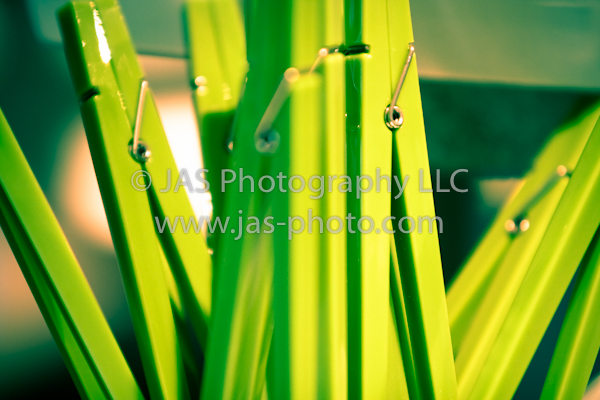
This is the kimmel center in downtown Philadelphia. The pictures is actually of glass – the vertical lines are the metal cords holding up the glass, and the slanted lines are the roof of the structure showing through the glass.

My daughters bouncy, gummy ball. Wide aperture. High contrast.

Art not so ordinary. Part 3.
Day 6. Movement. Today’s pictures are all patterns created from ordinary items with a touch of movement.
Tree branches swaying…take with a long exposure & a couple glasses of wine. =)

A tree with red christmas lights. This can be done even with a regular point and shoot camera. Just turn off your flash, and it will automatically set a long shutter speed. Then look up, and spin (just don’t fall!)

The entrance way to a resort in mexico. Taken at night with the lights on, from the window of our rental car. I propped the camera on the window sill to try to reduce vertical movement and focus mainly on the horizontal shear.

Taken with my iphone, while nursing my daughter in her nursery. The yellow is her wall, the very small smudge of brown is her rug, and the blue is a blanket sitting on the ottoman in front of me. It was not very bright in the room, so again, I turned off the flash, and basically waved the camera while I took the picture. It is pretty grainy since it is a long exposure taken on an iphone, but I like the effect. Reminds me of pointillism.
 This is the bottom of a small wading pool in a resort in Goa, India. Taken with a VERY old canon powershot. Again, no flash, and slightly long exposure (1/80) to allow for the wave.

Art not so ordinary. Part 2.
I decided to turn last night’s post into a week long series of abstract art from every day scenes. Hopefully it will inspire some of you to find beauty in your every day activities.
Try it out: In the next few days, look around you and find something ordinary and make it beautiful! Take a picture with your camera, or phone – whatever you have on you, and post a link to it here in the comments to one of my art series posts! Unfortunately it is not possible to post pictures directly into comments, but you can put a link to a facebook page or flickr page – wherever your picture lives. I would love to see what everyone comes up with! Happy snapping!
This is a close up of a door from a very old house in Old City Philadelphia, taken while I was on a walk with Radha. I just really liked how the chipped paint looked. Post processing: I turned up the blacks and the contrast pretty heavily.

This is a random truck parked on the side of the road in Old City Philadelphia. The original picture looked ok, but in lightroom (my FAVORITE photo editing software) I applied a preset that gives it a “crossprocess” effect. One of my favorite websites is lightroomkillertips.com where you can not only learn all sorts of cool tips for using lightroom, but where you can also download a ton of awesome presets to use on your pictures!

Old mailboxes on the coast of california while driving to Monterrey from San Francisco. It was a bright sunny day, and I just really like the weathered look of these mailboxes.

This is a thali (plate) of 4 ceramic bowls with different herbs/spices in them (turmeric, yogurt, henna, oil) used to “beautify” brides before their wedding. This was the morning of my sister’s wedding almost a decade ago! Taken on my now almost archaic (but still ticking!) canon powershot. My FIRST digital camera.

A random record store in Chapel Hill, NC (GO HEELS!). I liked this particular collection of artists superimposed on the musical genre sign. In Lightroom, I turned the saturation of all colors down to zero except for yellow (which I increased just a touch).

This is a set of glasses for sale in some random shop in california. I got as close as I could get to them without impinging on my shortest possible focusing distance (didn’t have my beloved macro lens at that time), then zoomed up even further and stopped the aperture down to about f/3.2. I like the abstract effect of the colors and almost not being able to tell what this is a picture of.

Same store, a cup full of bright green plastic clothespins. Did a bit of post processing on this one as well.
Art not so ordinary. Part 1.

I truly believe that you can see beauty .. or art … in almost anything.
The more you practice a craft, the more you start to think in terms of that craft – even in your day to day activities. One of the by products of my becoming a photographer, is that I seem to view the world in “pictures.”
Today’s post is an exhibit of this.


Find more of my art at: jas-photo.com
My humidifier recommendation

I have had many people ask me what humidifier we use in our daughter’s room, so I thought I would share it here. We use the Air-O-Swiss 7135 Digital – and have gotten great use out of it – especially over the last 2 weeks when Radha has had two really bad colds back to back (spending most of tonight in her room, holding her upright).
Anyways, the humidifier is definitely on the more pricey side, but it is very reliable, stays clean (it has an ionic silver stick) and can be used in a large room. It is quiet, and uses ultrasonic humidification, so as soon as you plug it in and put water in it, it is producing mist. We have been using it for 2 years now and are still very happy with it. In fact, we haven’t had any problems with it, which is more than I can say for the less expensive, store bought humidifiers that we have in our master bedroom (barely lasts through one season). The one thing you should keep in mind is that you need to elevate the humidifier off the ground about 1 foot to keep the surrounding ground dry. We have used it in our daughter’s room – both old with hard wood floor and new with carpet, and haven’t had any complaints.

As far as cleaning goes, the ionic silver stick keeps the water from getting gross (all the other humidifiers I have used inevitably start getting a nasty film on them), but you do still need to clean it with a demineralization cleaning packet every so often. The humidifier has a cleaning light to let yo uknow when it needs to be cleaned. We usually have at least a 1 month response time to this light, and it still seems to be working just fine!
Powered off
All the essentials for an afternoon with my hubby when the crazy wind gusts have left us with no power (the little one is napping):

The best swaddling blanket EVER
I while back, I wrote a post on http://www.Greenista.com about the Miracle Blanket. It is the absolute BEST waddling blanket ever, and I am always trying to spread the word about it other parents. I’ll let my post speak for itself, as I re-post it below.
Swaddle, swaddle, swaddle…baby’s best friend (and parent’s too)!
 For 3 years, I have spent one out of three to one out of four nights awake taking care of patients in a hospital, often so sleep deprived I wanted to cry… Yet NOTHING prepared me for the sleep deprivation of being a new parent! There is no respite from this new phase of life! Don’t get me wrong, I LOVE it, but it is definitely not easy.
Having seen several close friends’ children have miserable sleeping patterns, I became obsessed with how my baby would sleep…even before she was born! I started doing some research about sleep – talking to other moms, talking to physicians, reading books, watching DVDs…you name it (stay tuned for other posts on things I learned about sleeping). Perhaps the most prominent strategy I came across was “swaddling.” Now I know this may seem like an obvious concept for a lot of you, but trust me, there are some people who have never heard of it!
The idea is that you want to recreate the feeling of the womb for your newborn, who has just spent 9 months nestled very snuggly in the warmth of your (or your wife’s) belly. So, in preparation for Radha’s arrival, I watched videos, went to classes and read books on how to swaddle. By the time Radha came along, I was a swaddling pro! And I found that without a doubt, swaddling leads to better sleep. But alas, there is one main problem with this seemingly perfect plan:
No matter how hard you try, a little arm, or a little leg will somehow find a way to break free from the ever so perfect swaddle!
Solution: Swaddle me to, swaddle me fro, the Miracle Blanket is the way to go!
I tried many different types of swaddling blankets. All of them were basically either squares or rectangles. The basic idea is that you fold one corner down, put the baby in the middle with their neck at that fold. Bring one side over the baby, then bring the bottom up, and then the other side over (this is a little simplified…trust me, I was trying all of the most detailed swaddling tricks). The problem is, that depending on the size of your baby, and the stretchiness of the blanket, little babies’ legs and arms can wriggle their way through.


One of my friends finally suggested: the Miracle Blanket (www.miracleblanket.com). I hesitated to buy it, because it costs between $26-$29 a pop! I doubted it could be that good…. So, I borrowed one from a friend, and lo and behold, it WORKED! It is actually a little bit complicated to use (see this YouTube Video or website) but you get used to it very fast, and you will fall in love! As soon as I started using it, my daughter starting sleeping better. She, like all babies, sometimes cried more while I was swaddling her, but once she was swaddled, she would calm down, and because her limbs wouldn’t break free, she would sleep for long stretches in the night! It was awesome. Before I knew it, I owned 3! Hope you find this helpful – I would love to hear your comments and stories!
SUMMARY: The Miracle Blanket
PROS: It works! Arms and legs do not come out and babies stay asleep longer. You can use it from when your baby is a newborn until you want to wean the swaddle. Some babies do get too big for it, but they are usually ready to wean by that point.
CONS: Pricey… but no different than the over-sized receiving blankets that you will have to get once your baby gets bigger than 7-8 pounds. And a little complicated to use at first, but don’t worry, you’ll catch on quickly!
PRICE/AVAILABILITY: The Miracle Blanket is available online at www.miracleblanket.com – you can get many different colors and styles. The price is usually about $26 (~$5 cheaper than in stores) but you have to pay for S&H. You can also find it at BuyBuy Baby, for $29.99. Definitely the way to go if you want it ASAP. You will have limited color options, but should at least be able to find green, pink and blue. Also, they now have an organic options – perfect for all you “greenistas!”
At long last, a hat for me =)
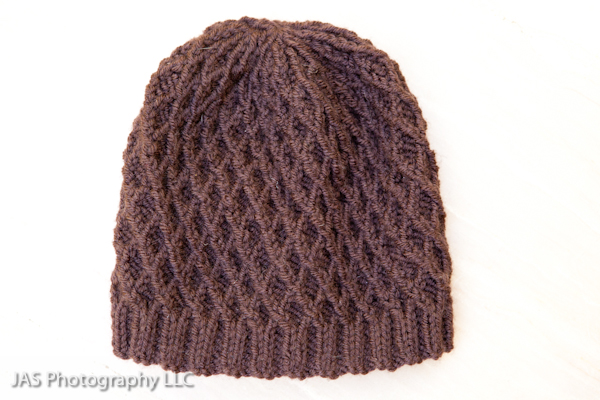
As I mentioned earlier, I usually use knitting and sewing as an excuse to make gifts for people, but recently I decided to make myself a hat! I think for the first time! I started off planning on crocheting a hat – since I had never done that before. So looked around online for a cool pattern, and found one with diamonds, similar to the pictures you see here (except these are knitted). But the pattern was SUPER complicated – much more than I could do as a novice crochet-er. Well, I probably could have done it, it just would have taken a LONG time and I would have to look up a lot of new terms and how-to videos on youtube. I was going to do all that, until I saw that the crochet pattern was actually based on a pretty famous knitting pattern by Jared Flood called the Koolhaas Hat. Turns out it is not a free pattern…and I rarely buy patterns (you can find SO many free ones that are great too!). But I really liked it, so I took the big $5 plunge. =)
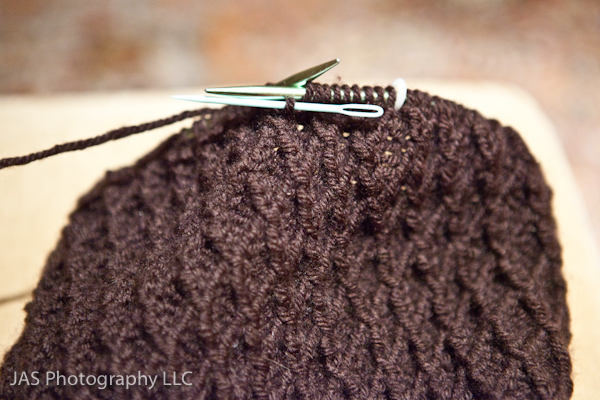
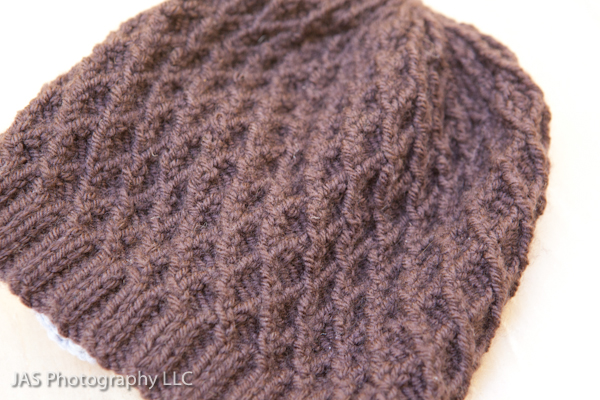
Well, turns out the pattern is actually pretty complicated, which when I’m knitting, is great because it keeps it interesting, and I get to learn some new skills. (sorry, i have a problem with run-on sentences) Anyways, here is the hat most of the way done. It is basically a TON of cables that crisscross back and forth. The pattern also uses a chart for the main pattern, which I had never used before (TIP: If you are working in the round, you read charts from RIGHT to LEFT on each row. If you are working on regular needles, you read them R –> L, then L –> R and keep switching off).

The instructions say to use a cable needle for the cabling that you have to do on every other row, but I found it much easier to just use a tapestry needle. Each time you cable you only have to cable one stitch at a time, so you dont need a long needle. AND, it is so small, that it is easy to hold in your hand during the stitches that you are not cabling. I thought it worked really well.
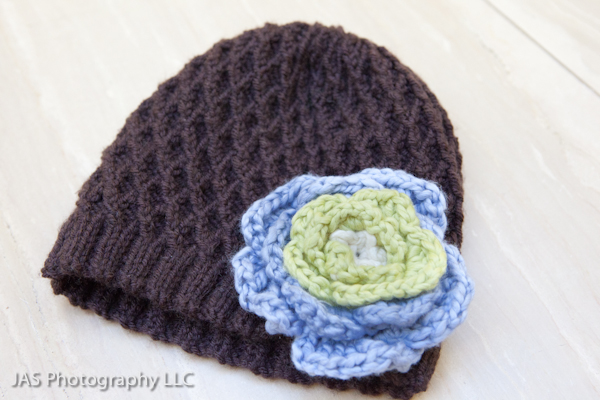
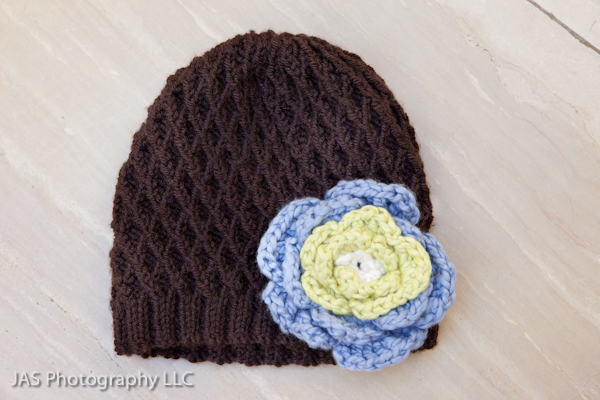
This is the finished hat. To be honest, my impatience got the best of me, which is why I ended up with a brown hat (I’m usually into brighter colors). One night a couple of weeks ago I basically decided to make the hat, found the pattern, and then wanted to start right away! When I looked through my stash of yarn, I found that I didn’t have many options in the right weight yearn. So without knowing how complicated the hat was going to be, I figured I would make one with the brown for the hell of it (a present?) and then make another one for myself with a color I really wanted. Well, once I got started, I decided it was taking too long to make another one any time soon (I dont usually like to be tied down to one project for too long). So i ended up keeping the brown hat, and embellishing it with a flower!
I have only crochet’d a couple of flowers before, but I like this one the best. Unfortunately once I made it, I thought it was WAY to big – likely because I just wasnt used to seeing myself with flowers on me…but I think I will keep it as is! HERE is the website where I found the pattern for the flower, and HERE is the website where you can buy the hat pattern. Enjoy!
Just another dandelion
Last fall…hmmm…actually two falls ago (!) my hubby bought me a new macro lens for my birthday, which I LOVE. Well, to be honest, I actually exchanged the one he got me for the more expensive L version…that one I REALLY LOVE. =) Anyways, I was looking through some of my pictures that I took right after I got the lens, and just wanted to share today. Enjoy =)


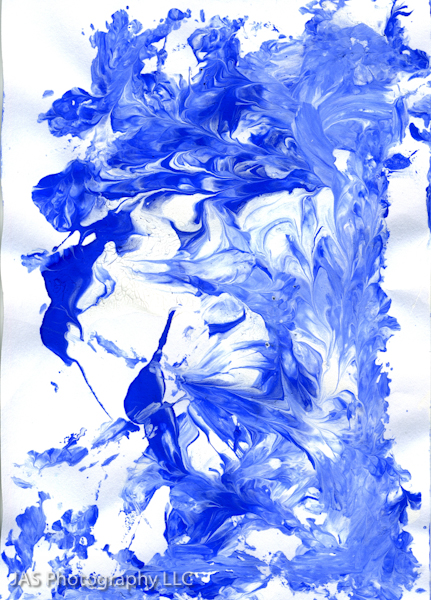
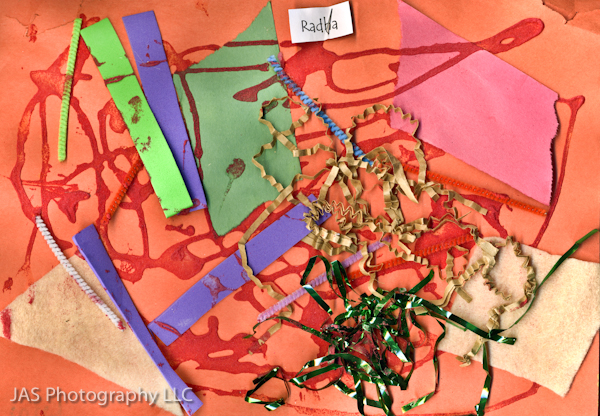
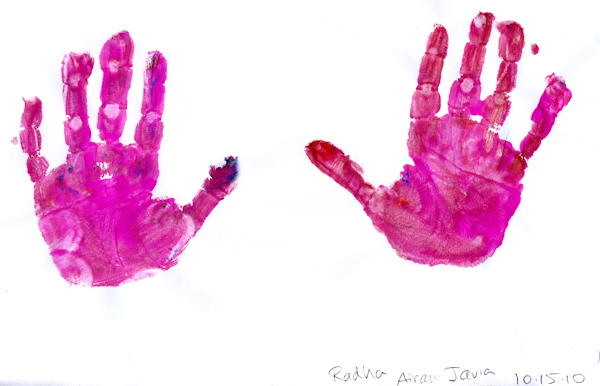
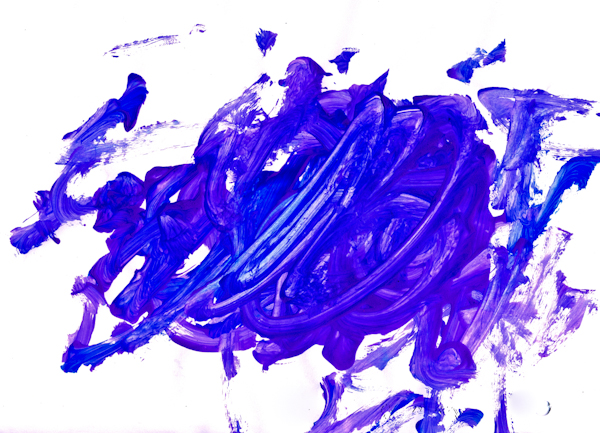
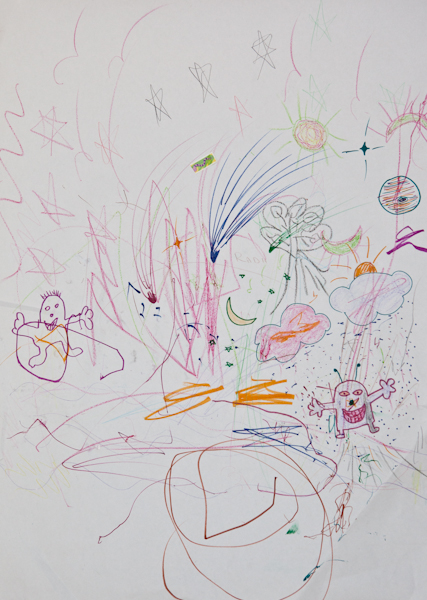
How to preserve your kids' art
Our kids, nieces, nephews make SO much beautiful art – I’m sure everyone’s’ do! So, the big question was: “How do I preserve this art?” I know that it is not practical for me to think I can physically keep every single piece of art that Radha makes forever…so, I decided to digitally record them. I either scan them (as you can see in the first several images), or I take pictures of them (the last 2 images). This way, I can digitally record EVERYTHING – even if it is just scribble – what is a few bytes (or kilobytes) here and there? And then the ones that I really like, I physically keep. Most of them are likely going to stay in files, but I am planning on getting cork board tiles to put up in our hallway, and display her most recent pieces there all the time. That way she sees that we think they are important and beautiful, and hopefully gets encouraged to do more! Another idea I recently had and am going to try out this week, is making 3×5 or 5×5 prints of some her masterpieces, and turn them into thank you cards or blank note cards! That way I can share her art with everyone and put a special touch on our friendly notes. I’ll put up some pix of those once I get them done!
FYI – if you are scanning the art, here are a couple of guidelines for resolution: If you would like to be able to reproduce your scanned image at it’s original size, then you can use 300ppi. If you would like to be able to enlarge the image – i.e. print an 8×10 from a 4×6 scanned image, then you need to multiply the resolution proportionally. For example, if you are going to make a 8×12 print of a 4×6 image, you should scan it at 600ppi. Or if you are going to make a 12×18 print (or something in that ballpark), you should scan it at 900ppi.
Hope that helps!