The forgiveness of black and white

Black and white pictures really let you focus on the emotion of a picture. Either on someone’s face, or in their movements.
I find there are often pictures I take that I LOVE because of the feeling they give me – happiness, being carefree… but unfortunately, are often blurry. This may be because I was trying to capture a fast moving toddler or it was dark and I refused to use my flash…among other things.
I have found, that making these slightly blurry pictures black and white can not only save the picture, but let you really focus on the emotion that drew you to the image in the first place. Everything else kind of melts away and all you see or feel is that emotion.
So before you trash a blurry picture, try it in black and white – it may find new life!

If you don't try it, you won't get it

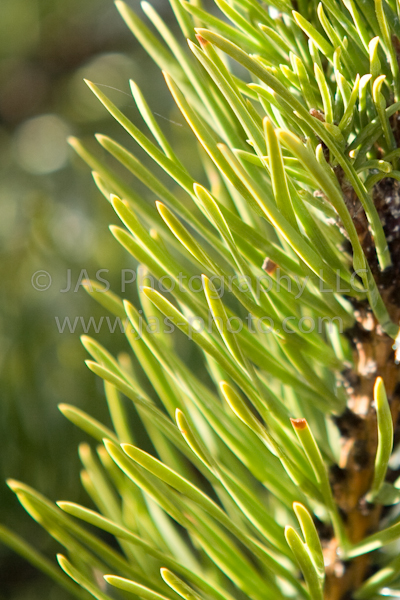
I took this image from the window of a moving bus on a very bumpy road in Tanzania, Africa. I saw this tree out the window and really wanted to capture it. So I quickly stuck the camera out the window, aimed, and shot. This was actually taken with my old Canon Rebel film camera – so I had NO idea if it even came out until I got all 12 rolls of film developed (I do NOT miss the days of having to ration the number of pictures I take!).
The point however, is that I got lucky, and happened to aim at the right spot at the right time. So the tree is in focus while everything else has the motion from the bus. I love the feel it gives of peace amidst chaos.
Take home point? If I would have hesitated for even a second to wonder if the picture would have turned out before actually trying to take it, I would have missed the shot! So it is better to at least TRY and see if you get lucky! Especially in the world of digital photography when you don’t have to worry about having enough pictures left (at least not as much…you still have to have plenty of flash cards on you though =)
Have fun!
Get dirty

Today’s photographs are reminders to try approaching your photographs from a different perspective. Sometimes, that means getting dirty. I know it sounds a little cliche – people are always talking about finding a “new” way to photograph the same scene. Sometimes it is not that easy – especially when you are in a national park and have limited options for where you are allowed to go. But if it was easy, then everyone would have that picture, right? Sometimes you have to get your feet (and knees, and hands and butt for that matter) dirty to find a different shot.

The above picture was simple – I just laid down on the ground. These tulips were actually only about 10 inches tall, but laying down on the ground makes them see taller than life.
These next few images might be the best examples of perspective. When we went to Yellowstone, we kept seeing pictures everywhere of Grand Prismatic spring and all of its rainbow of colors. Well, we get there, and the BELOW image is what we see. Where were the colors??? All I could see was orange and smoke. Granted, it was still beautiful, but I had my heart set on seeing the grand picture that I had been enticed with. The spring was actually hidden behind all the smoke because it’s water was boiling hot and the air outside was cold. So….we drove to that hill you see in the background of the shot, and climbed. Not sure if we were “allowed” to, but we did.

And this is what we saw! Looking back at these shots, I am sad that I didn’t have a wide angle lens at the time, so I wasn’t able to get the whole spring in one shot..but at least I was able to get some of those amazing colors:

I can’t believe that if we didn’t hike up that hill, we would have missed this completely! You couldn’t see anything past the orange from the ground.

So today’s take home points?
Lay down
Turn around
Walk in the mud
Take a hike
Get dirty
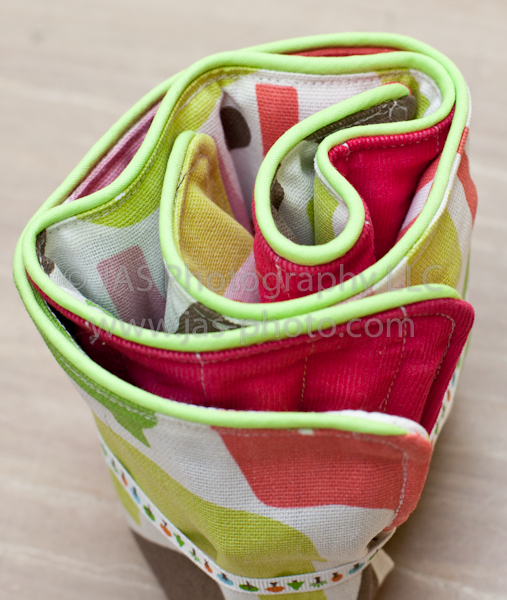
Car and Crayon Roll
Radha’s new Crayon and Car Roll!
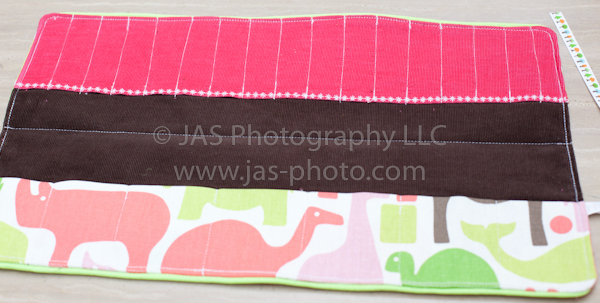
Whenever we go to dinner or out somewhere, I usually take some crayons and toy cars with us. However, I usually end up just dumping them in the diaper bag, and…losing them.
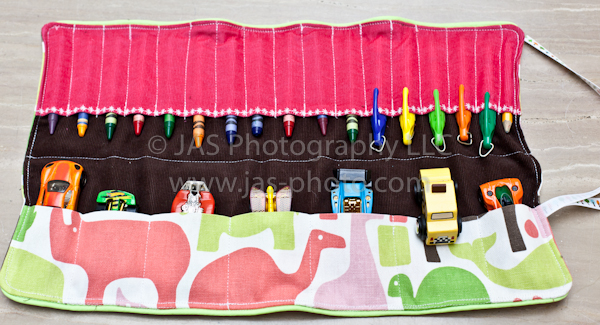
So I found this really cute tutorial for a car cozy on Handmade by Jill, and decided to make it with a car cozy on one side and crayon pockets on the other! All in all it took me about 2 hours to make, so not that bad.
I used canvas for the outside and for the car pockets, and then corduroy for the inside face and the crayon pockets. I also used a cute embroidery stitch to sew the hem along the top of the crayon pouch. For the crayon pockets, I sewed each seam 1 inch apart. However the whole width of the fabric is 17 inches…which is kind of alot of crayons and leads to alot of bulk when rolled. So you might want to do slightly larger pockets – like 1.25 or 1.5 inches – especially if you have some fun, fat crayons.
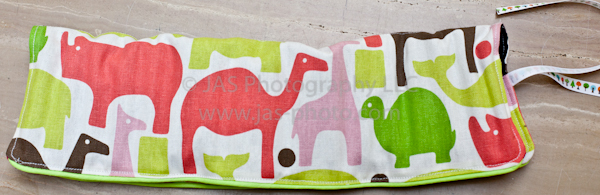
The one thing I would do differently is use a heavy dute strap and velcro forthe closure like Jill does in her tutorial. I didn’t have any on me, and of course, I was making this spur of the moment at 11:00 at night, so I used what i had: Ribbon.
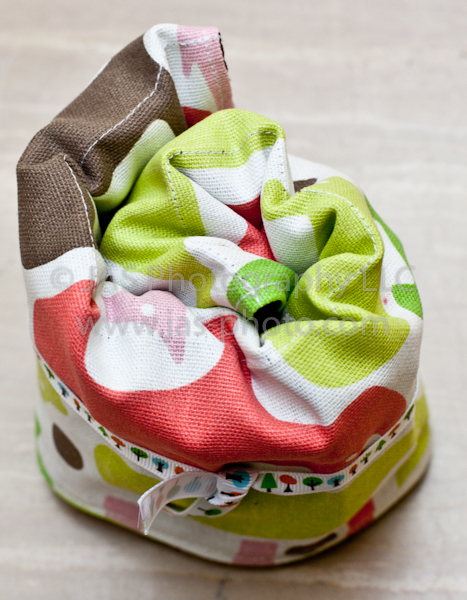
It works, but it is not so sturdy.
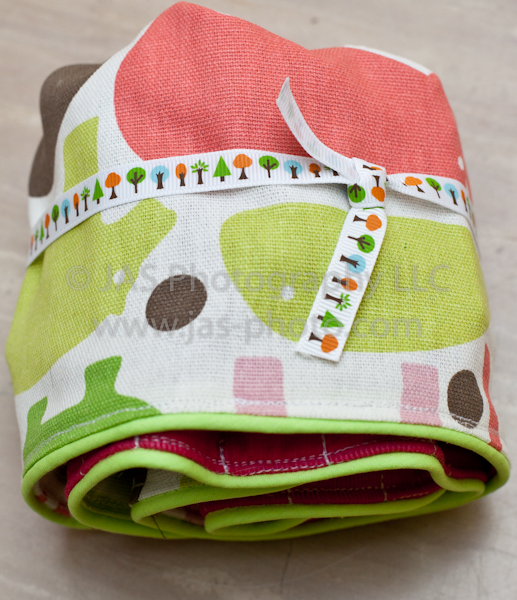
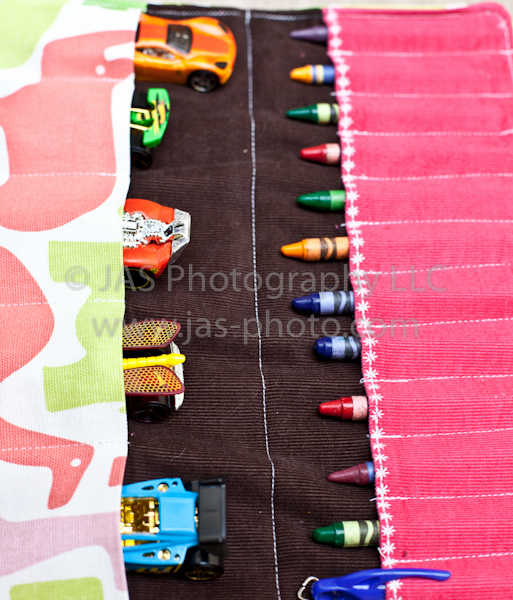
I love the look of the piping – it was my first time using it! I might be addicted…
On a side note, I’m really excited because today I have a private sewing lesson! I have been making these projects by teaching myself, reading tutorials and watching you tube videos, but want to learn a little but more about the sewing basics. So I’m taking a 1 hour private lesson tomorrow – and will probably take more later. Wish me luck!
A little sexist??

I thought about this when I started this blog…but am revisiting the thought again: “All.Things.Mama” is somewhat sexist given that everything I am writing about is really applicable to moms and dads – and non parents for that matter.
So…
I am thinking about changing the blog name to All.Things.Subha.
Thoughts anyone? The things I write about are really a completely random collection of topics…unless you are me =) Because they are all things I am interested in, do or think about.
It would be a little bit of a pain to change, but I figure I’m only about a month and a half into the blog, so better to change it now rather than later.
Yes? No?
Excited for spring!
I am SOOOOOOOOO excited for spring!

Sun. Playing outside. Sun. Late sunsets. Sun. Warm weather. Pools parties. Sun.
Sun
Sun

Can you tell I’m tired of winter and excited for spring??
Lesson of the day

Today’s lesson of the day:
If you are considering purchasing high end audio equipment on a tight budget, do NOT accompany your spouse to the local high end audio store where the slick salesman (who, by the way has the coolest job ever…ok, after the cast of Glee that is) will quickly seduce your ears, and you, into thinking you need a component that is actually TWICE the price of the one you were originally planning to buy! Oh, and don’t forget the incredibly “reasonably” priced monstrous speakers you were listening to when comparing the audio components. Instead, one of you should stay in the dark while making these decisions so that you can be the voice of reason when your spouse wants to spend all of your saved up gift money on audio equipment. I’m just sayin.
Last Hurrah Sale – 50% Off
![]()
A couple of years ago I started an Etsy shop selling custom labels and stickers. After some time, I realized that what I loved most about it was making the designs, not printing the labels.

So I changed the focus of my shop to creating designs for people, and selling PDFs of the designs that were ready to print and could be used as many times as they wanted.

Well, although I still love doing graphic design, and although I am still doing custom requests for labels or party deocrations, I have started focusing on other things, and thus will likely close my etsy shop soon.

SOOOOO….I am having one last sale of all items in my shop – every design, with custom text, for 50% off.
Just use the coupon code “50off” – please help spread the word!
Come check out my designs!
There are SO many different uses for my designs:
Party decorations
Hang tags
Envelope seals
Gift bag stickers
Favor bags
Handmade packaging
Book plates
Gifts!
Address labels and more!
Simple fleece elmo hat
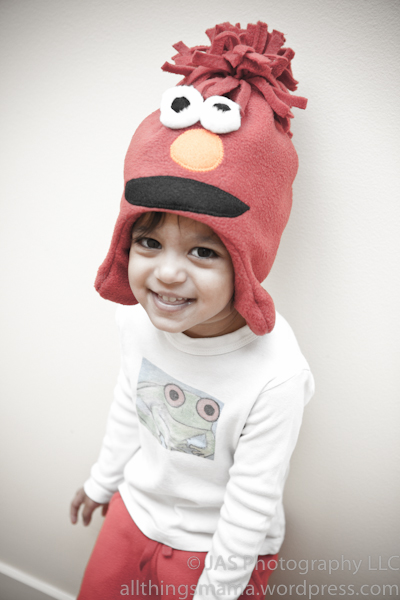
If you child is anything like mine, he/she is probably obsessed with the little red monster they call ELMO. Given the temperature around here, I recently ordered a knitted elmo hat from a website…and was not very happy with it. So, I decide to knit one for Radha myself. Well, several days into, after I already knitted the earflaps and the black mouth, I realized that I made the hat large enough to fit TWO heads into it. So, I had to take it all out. In the meanwhile, I decided to make her an Elmo hat made out of FLEECE, and this is how it turned out! I actually saw a blog post on Made by Rae about how to make a simple fleece hat, and based my elmo hat off her tutorial. I would definitely check out her tutorial for the details of how to construct the hat. I will describe below how I made it into Elmo and the one change I made to her design.
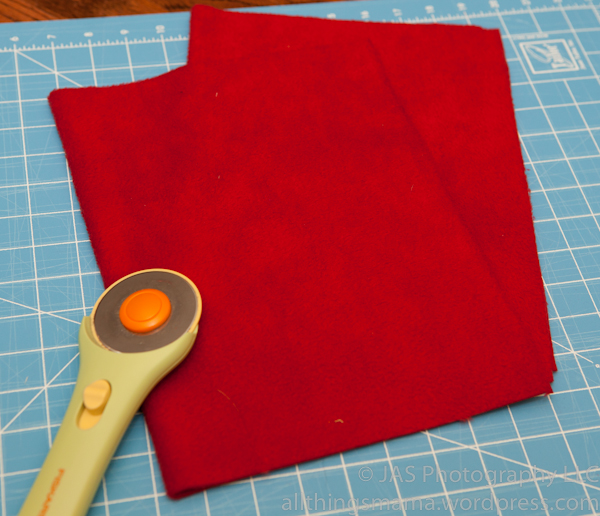
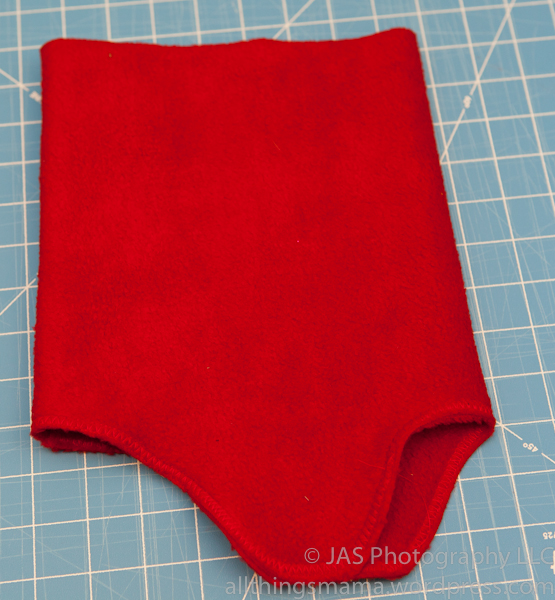
First you start by cutting your inside and outside fabric. I used red for both since I was doing Elmo. I had to cut my pieces larger than Rae’s tutorial describes, because the first time I cut them as directed, the hat was way to small (i think my fleece may not have as much give to it).
Measure the width of the head that you are making the hat for, and the width of the rectangle you need to cut will be that head circumference, divided by 2, plus 1. Radha’s head circumference is 18 – so the width of my piece was 10 (18/2 = 9, 9+1 = 10). The height of your rectangle should be about 12 inches. Cut the fabric on a fold on one side, so that there will only be a seam in the back of the hat, instead of down the front as well. Also, make sure to lay the fleece so that the stretchy side is along the width of your hat.

Then you cut out the ear flaps. The height of the flaps should not go past 3 inches. You also want the flaps to be slightly more towards the back of the hat than in the middle, so that there is larger opening for the face.
Tips:
1) Make sure you remember that the fold of the fabric is the front of the hat, so the ear flaps should be FARTHER from the fold and closer to the open seam.
2) Don’t move the ear flaps too far off center – it becomes a little strange (see above picture)
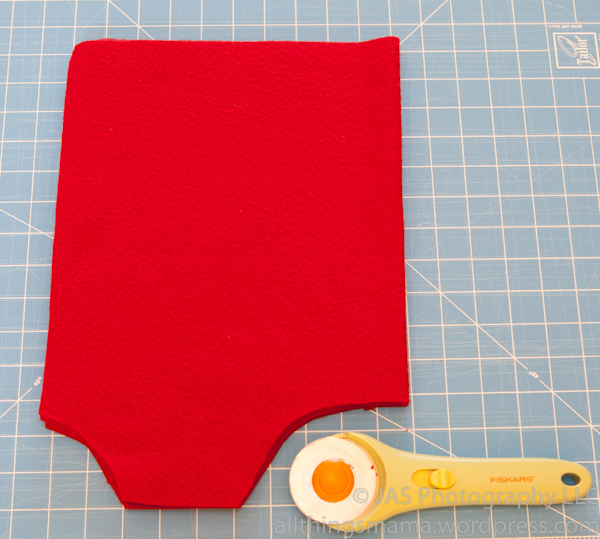
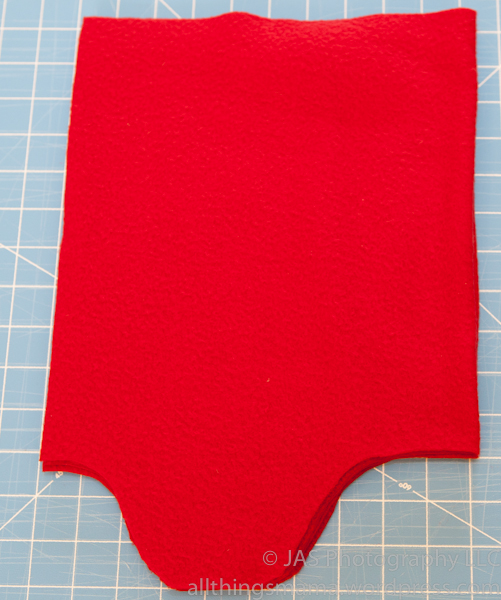
The second time I made the hat I started with rough cutouts from the front and back, and then went back and curved out the edges.
Next, sew the open vertical seams of both the inside and outside material. I used a 1/2 inch seam allowance, and used an overlocking stitch.
Next, place the fabrics right sides together, and sew the bottom seams along the earflaps together. I used a straight stitch here, and then cut out some fabric so that it wouldn’t bunch too much when it was turned right side out.
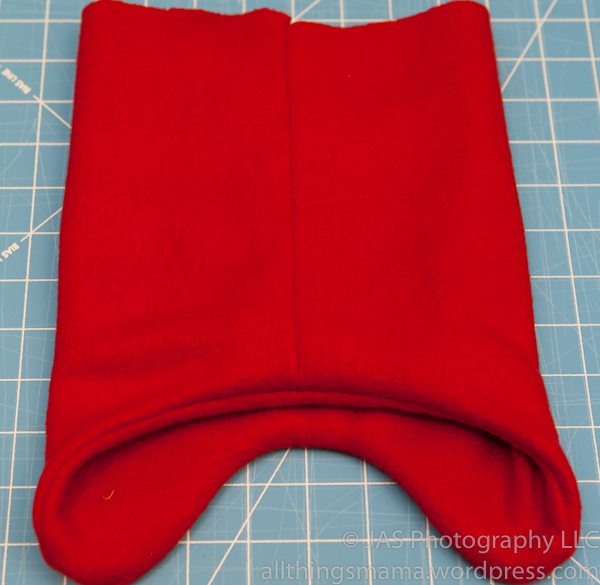
This is what it looked like once you turn it right side out.
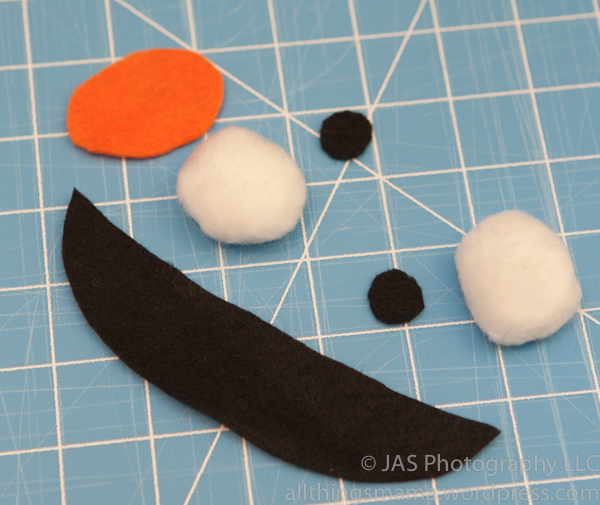
Next I gathered the pieces of elmo’s face! I used fuzz balls that you can buy from any craft store for the eyes, and then used orange and back felt to cut out the pupils, nose and mouth.
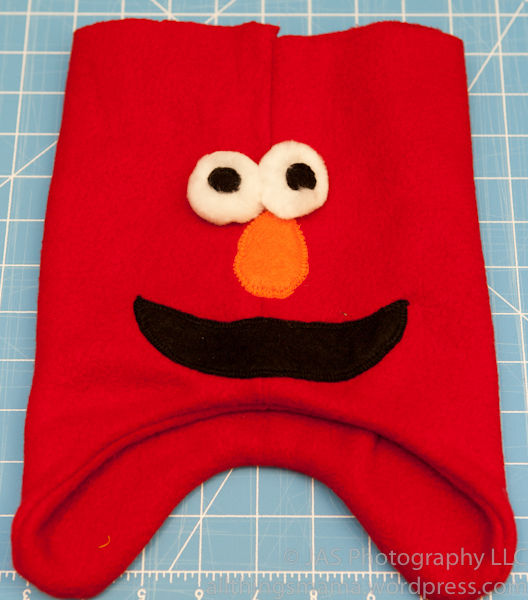
Then sew your pieces onto the outside of the hat. You could also sew the pieces onto the fabric BEFORE you sew the bottom seams of the hat together, so that it is easier to maneuver in the machine.
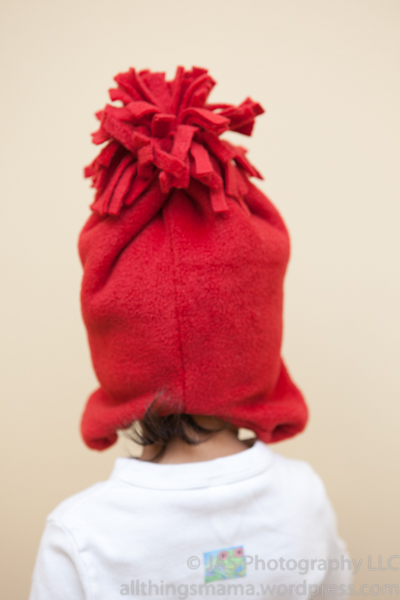
Once you have put everything onto the hat that you want, you then take a 1/2 inch strip of the fleece and tie it around the top of the hat about 3 inches down from the top. I then cut the top of the hat fabric into strips to make a pom pom. The beauty of fleece is that it doesn’t fray – so you can cut it as much as you want.
(Note: Again, this is all from Rae’s tutorial, I’m just paraphrasing what I did to make it into elmo and to remove the seam from the front of the hat. My pictures aren’t nearly as good nor are my instructions as clear, so please check out her post!)
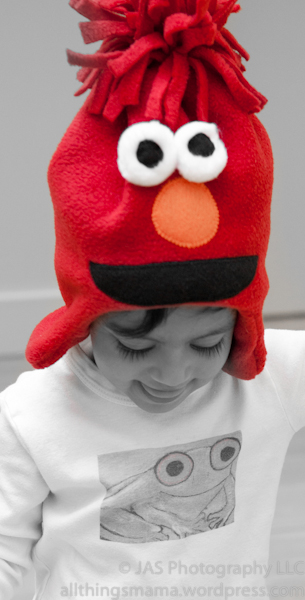
And viola! You have a genuine elmo hat! As you can see, the hat my daughter is wearing above is different than some of the samples above in that there is no seam down the front (i mixed up the front and back the first time I made the hat…what can I say, I’m a novice!)
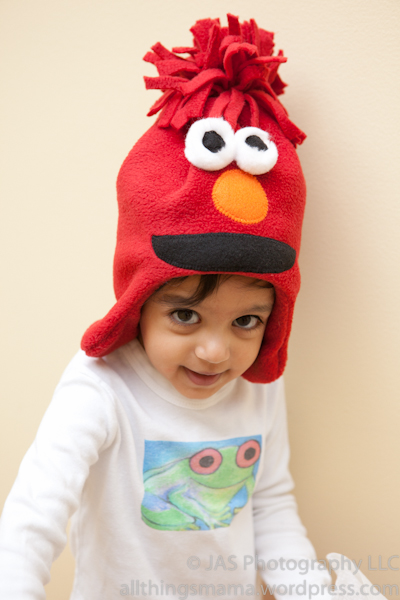
Hope your little one enjoys it as much as mine!
Friendly Inspiration
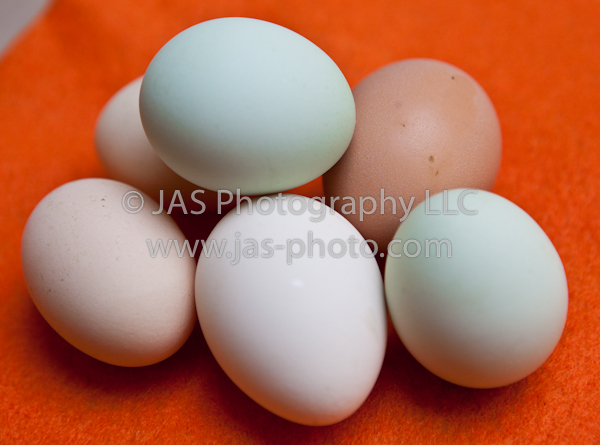
We recently met a family from Radha’s class who gave us the above eggs when they came over for dinner. Aren’t they beautiful? I had NO idea that natural eggs come in so many different and wonderful colors! This family has 6 chickens that live in a coup behind their house, and is the source of their daily eggs. Some lay brown eggs, some lay blue ones and other lay greens ones. I find them so much more amazing to look at than the plain old white ones we see in the store!
Well, this family has opened my eyes to many other things about the food industry as well. I will no go into a whole diatribe about it now because I do not yet know nearly enough to be able to speak knowledgeably about it. But I will say that they have inspired me to read and research more about our food and where it comes from, and thus to eat more responsibly.
What have I done so far?
1) I have watched Food Inc. – This documentary is available instantly on Netflix – which is where I watched it (through my Apple TV of course). I was crying within the first 5 minutes and pretty much throughout most of the movie. It is profoundly eye opening and something that I think EVERY meat eater should watch.

2) Watching the above (and talking to our new friends) itself has led me to eat less meat and buy meat more responsibly (at least for now I am trying to buy “cage free” meat that is preferably grass fed.
3) I am now in the process of reading the Omnivore’s Dilemma. I am already at the point where I feel like I can’t eat ANYTHING without feeling guilty! Nevertheless, I am glad that I am reading it and learning about the craziness that is our food industry. Actually, every time I read it I start sweating because I get so upset.

I still have a long list of other documentaries and books to get through that my friend has recommended to me. I will keep you all updated as I go. I recommend reading and watching them as well so you too can be inspired to make a CHANGE
