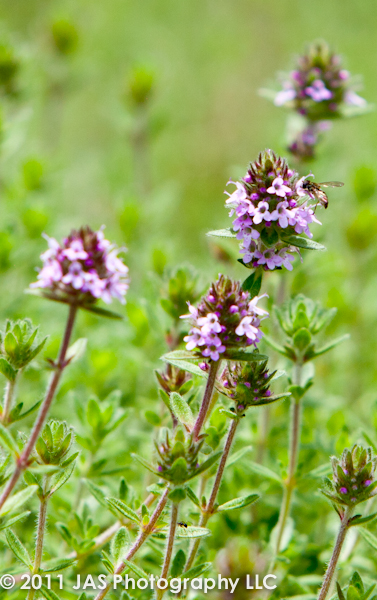
More flowers from our trip
apparently I have a thing for taking pictures of flowers…


I have a friend for whom I have been wanting to make a stuffed sea turtle…but it seemed like a very difficult task that I was having a hard time starting… i just hadn’t made anything as complicated before, so I was scared to start!

But then, I saw THIS amazingly well timed post at by make-it-and-love-it for making stuffed turtles! So I thought – AWESOME! I can just base my construction off of this tutorial, and draw my own pattern pieces to make the turtle into a SEA turtle instead of a regular turtle!
So that’s what I did! And here is what I came up with:

So if you like what you see, here is the FREE printable pattern (print on regular 8.5×11 paper):
(Please note: This Pattern is only for personal use. It is copyright protected and not available for commercial use without expressed permission from JAS Photography LLC. Please email info@jas-photo.com if you would like a commercial license for this pattern)

and then go to make-it-and-love-it and check out her tutorial for how to put the turtle together!

Pattern pieces
Just a couple notes of what I did differently:
1) Of course, I used different shapes from my own pattern pieces

Shell and stomach fabric pieces cut out
2) I did not make a tail (in all the pictures I looked at online, i never saw a tail on the sea turtles)

Arms, legs and head pieces cut out
3) Instead of sewing the head of the turtle in between the shell pieces, I made mine flat and sewed it in between the shell and main body piece – just like you do the legs.

Arms, legs and head of turtle after stuffing and sewing shut
4) Once I sewed around the edge and turned the turtle inside out, I did not sew the opening closed by hand (i usually try to avoid that if at all possible). Instead, I top stitched another seam around the edge of the turtle, and in doing so, i sewed the opening closed. I thought this worked well for the sea turtle because their shells seem to be more flat anyways!

That’s it!
How cute is it!?! I hope you like it – it makes a GREAT baby gift!


(Please note: This Pattern is only for personal use. It is copyright protected and not available for commercial use without expressed permission from JAS Photography LLC. Please email info@jas-photo.com if you would like a commercial license for this pattern)
Cute stuffed elephant (Free Pattern!)

I made these cute little stuffed elephants (with the help of several family members!) for the gift bags for my daughter’s first birthday party last year, and thought I’d share the pattern!

(Please note: This Pattern is only for personal use. It is copyright protected and not available for commercial use without expressed permission from JAS Photography LLC. Please email info@jas-photo.com if you would like a commercial license for this pattern)
You can download the elephant pattern here.
To make the elephant:
1) Gather supplies: Fabric pieces – You can have fun with using totally different fabrics, or match one ear to the other side of the elephant and vice versa.
- you need 2 body pieces,
- 4 ear pieces, and
- a small strip of ribbon for the tail (~2 inches long)
- 1-2 bells and a small hard container to put them in that can fit into the elephant (optional, to make the toy a rattle also)
2) Put 2 ear pieces right sides together, and sew along the curved edge from one corner to the other (leave the straight edge open)
3) Repeat for other 2 ear pieces
4) Turn the ear right sides out
5) Sew an ear onto each body piece. I first positioned the ear how I wanted it to sit, then flipped it over along the straight edge and sewed that into place. Then flipped the ear back over and did a second stitch to secure it.
6) Once both ears are in place, put both body pieces with right sides facing, and sew along the entire edge leaving a 2 inch gap open at the bottom to turn it (i left the area between the legs open). Some curvier areas are tricky, so sew slowly on those spots. For the tail, fold the ribbon in half with wrong sides facing. Then put it in place at the elephant’s bottom, sandwiched in btween the two body pieces, and line up the raw edge of the ribbon with the raw edge of the fabric (or you could let it stick out a little bit as well). When you sew the edge over the tail area, back stitch several times to make it secure.
7) Turn right side out and stuff! If you want to add the bells – do it now.
8) Once it is all stuffed, sew the bottom closed by hand, and you are done!

Hope you enjoy it – it makes a great gift for a new baby too!
(Please note: This Pattern is only for personal use. It is copyright protected and not available for commercial use without expressed permission from JAS Photography LLC. Please email info@jas-photo.com if you would like a commercial license for this pattern)
Flowers from today
Saw some beautiful flowers today, thought i’d share…


My Hindi Alphabet Video is now available for free!
Last year I made this 25 minute video that goes through the hindi alphabet with sounds, pictures and animations to teach R the hindi alphabet. For a long time afterwards, the only way I could get her to eat anything was by showing her the video! It was pretty cool.
Well, I put it up online for sale a while back, and have since decided to make it free for everyone. I don’t really need to make money off of it…and I’m not anyways =)
So, it is available for all who would like it! Here’s a little clip:
Just go to my website: http://www.babyculturecards.com, and click on the link to download the video. It is long (~112 MB) so will take a while. But once you have it downloaded, you can import it into iTunes and play it on your iPhone or iPad, you can also play it on pretty much any computer! I am working on editing the video to add english translations, and then next will make a gujarati version. I am also looking into make this into an app…but not sure if there is a point yet since you can download it and put it on your phone that way.
Anyways, enjoy and please spread the word!
Handmade gifts for R’s teachers

R finished her first year of school this year (can’t believe it!). And her teachers were amazing – so I wanted to make them something special as an end of the year thank you.
Thanks to Grosgrain’s month of free pattern giveaways, and Rae’s contribution of a Chevron wristlet tutorial, I made these cute little wristlets for all three of them!
I used random t-shirt scraps and some ric rac to embellish the outsides, and I used a fun contrasting material to line the inside and make a nice sized pocket for credit cards or keys etc.

I also printed a 4×6 picture of R and mounted it on a cute stationary and wrote “thank you” on it with R’s help. That gave the whole thing a nice personal touch!
I know it’s late for teacher’s gifts, but thought I’d share!
Check out grosgrain here and rae’s tutorial here!
Perspective is [sometimes] all it takes


I have written about this before, but as I was looking through some of my pictures (I’m working on re-vamping the fine art page of my website) I noticed these two pictures. They look SO different and I have very different reactions towards them. The first one is very BLAH and not exciting. I took that one standing up. Then I realized that the sky above was slightly blue, so I got down on my knees (actually I think I was on my elbows) and re-took the picture at below the level of the dandelion, so I could get the sky in the background.
And viola! A totally different picture!
So just a reminder to say that perspective makes a HUGE difference when trying to take creative shots. So get dirty, move around and have fun!
A few more “worn” items
Apparently I like taking pictures of “old” things, so I thought I’d share a few more pictures that go with this week’s photo challenge, “worn”


A garden meal
I thought I would give you all an update on the garden and share a meal I made recently inspired by what we have growing!
My meal:
Garlic tilapia with fresh oregano and sage (description below)
Lemon truffle salad (description below)
Bread and cheese (from whole foods)
Mango nectar

The vegetable garden is coming along fabulously! Above you can see the tomato plants – this was taken about 1 week ago, and now the plants are all coming out over the top of the support structures!
 Yes, that is a cute little baby deer walking through our lawn…i think trying to get a nibble on the veggies…
The squash and zuchhini are going crazy – as you can see in the bottom left corner of the above picture, i had to put a trellis to separate them from the other plants they were trying to snuff out. The poor cucumbers that I planted next to them are desperately trying to find their way to sun out from underneath the gargantuan squash leaves…hopefully they’ll make it.
Needless to say, a lot of lessons learned for next year!
 These beauties (san marzano tomatoes) are soon to become some lovely pomodoro sauce – along with some basil that you cant see not too far away =)
 These cherry tomatoes will adorn many a salad…
 That is a red cherry pepper – don’t have a great use for these yet…except that I did have some excellent ceviche with very tin slices of red cherry pepper in them and it was AMAZING. Maybe I’ll do that!
 Future guacamole/salsa (jalapenos!)
And now for my garden inspired meal:
 1) Fish with garlic chive butter, sage and oregano. I have started making this a lot recently as I tried to find uses for my fresh oregano.
 I basically buy fish, put it on a piece of aluminum foil, sprinkle salt and pepper on it. Then add some lemon juice (actually I do the lemon juice first so that it doesn’t wash away the salt and pepper. I also poke some holes in the fish with the fork to make it soak in more). This time I did something a little different – I had some thyme and garlic chive butter I made from our herbs, and added that on top of the fish to add some extra flavor! Then I just placed some fresh sage and oregano leaves (or the whole oregano stalk) right on top of the fish.

Then I close up the aluminum foil around each fish to make a little baking dish for it. I leave a tiny opening on the top so that steam can escape. You can do this with parchment paper also, but i think foil is easier because you can crinkle it closed instead of having to find some other method (like a stapler?).
And that’s it! Then I just bake at 400 deg for about 15 minutes and its done!

I’m not really that great at presentation, which is why this doesn’t look all that appealing…but it tastes awesome =)
 2) Green Salad with lemon truffle dressing made from the last of our greens. This was me soaking the lettuce to get all the little buggies off… =0

And I added some cherry tomatoes.
For the dressing I mixed lemon juice (usually fresh but used bottled this time), you can add lemon zest if you have some lemons on hand, salt, pepper, and truffle oil. That is the key ingredient! As far as proportions, I usually put mostly lemon juice – maybe 1/4 cup with just 2 tablespoons of the oil. The rest is to taste.
This dressing is awesome because it is SO simple to make and tastes so great. The salad tastes even better if you put Parmesan shavings on it…but didn’t have any.
So that’s my meal! In the back you can see I got some bread from whole foods and had bread and cheese on the side. YUM.

 Oh yes and how can I forget! My mom brought up a TON of mangoes from her backyard (YAY for mango season!). I like to eat them freshly cut. But my hubby likes to eat it Gujarati style, as “mango ras” which literally means mango nectar. You basically just blend the mangoes and if there is a lot of fiber, then strain them as well. And enjoy!
Weekly photo challenge: Worn

here’s my contribution for the Daily Post’s weekly photo challenge: “worn”
it is of an old engine in a barn in Maryland.
